How To Tie A Rolling Hitch Knot
Published by Joe Appleton in Nautical Knots Last updated on July 12, 2022
It’s a wise idea to learn how to tie the Rolling Hitch Knot. It’s practical, simple, and has many uses. The knot is often used for attaching a rope to a pole, or to attach a rope to a larger line. It’s a basic friction knot that’s designed for a lengthways pull, rather than to move an object at a right-angle. This makes it an excellent knot for hauling something in an upwards direction!
Historically, the Rolling Hitch was known as the Magnus Hitch. However, it was dubbed the Rolling Hitch in Richard Dana’s 1841 book The Seaman’s Friend. Since then, it has been known as the Rolling Hitch Knot, and it can be found in the Ashely Book Of Knots, listed as #1735. In Ashley’s book, the knot is described as being a good knot to attach a rope to another rope when the line of pull is in a parallel direction.
Uses
The Rolling Hitch Knot has many practical uses. For example, it’s a popular knot that’s used in both sailing and scouting for joining a rope to a spar, or to a larger rope, and to secure a snubber to an anchor chain.
It can also be used when a winch is jammed by tying this knot on to help relieve pressure on a taut line. It’s also occasionally used by the fire service to help pull a rope upwards. It can also be used in construction for hauling tools.
There are plenty of uses for this knot, and that’s why you should take the time to learn it. Here’s all you need to know.
How To Tie A Rolling Hitch Knot
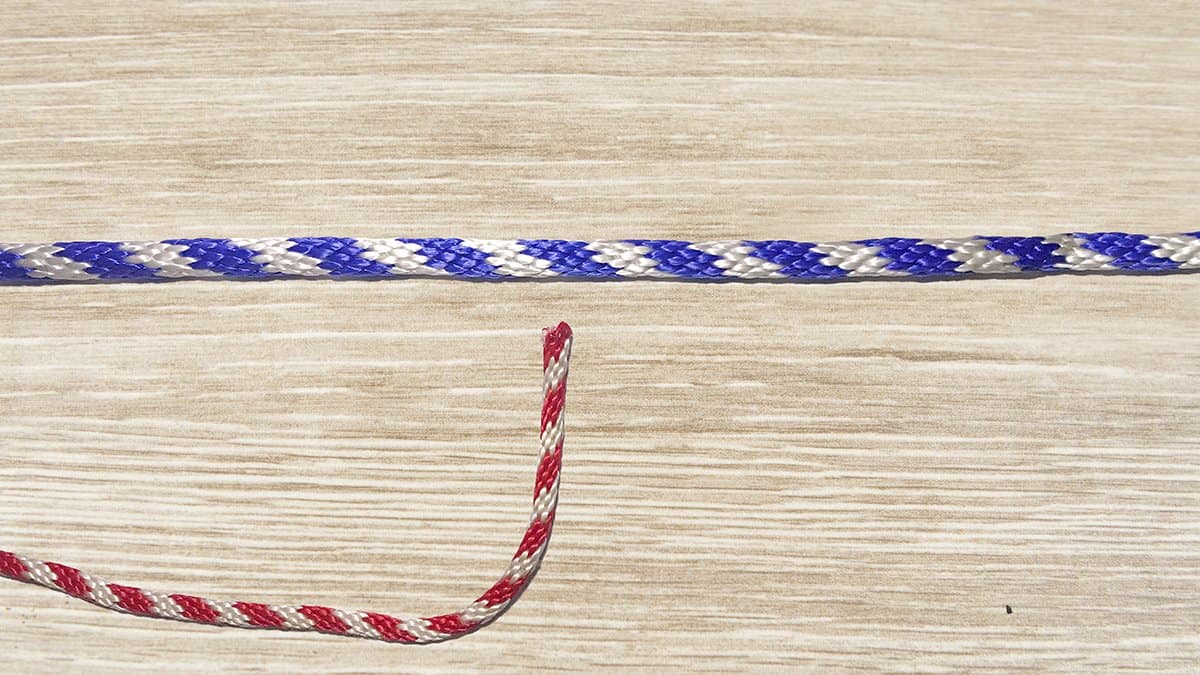
To learn how to tie the Rolling Hitch, you’ll need two lengths of rope, or a single length of rope and something to act as a spar to tie it to. Once you’ve gathered your materials, follow these steps to success!
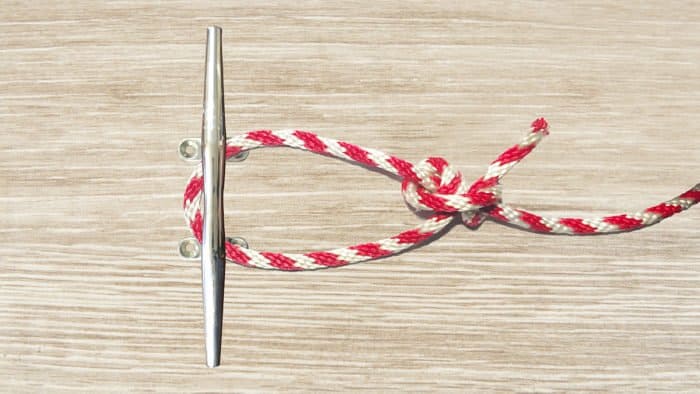
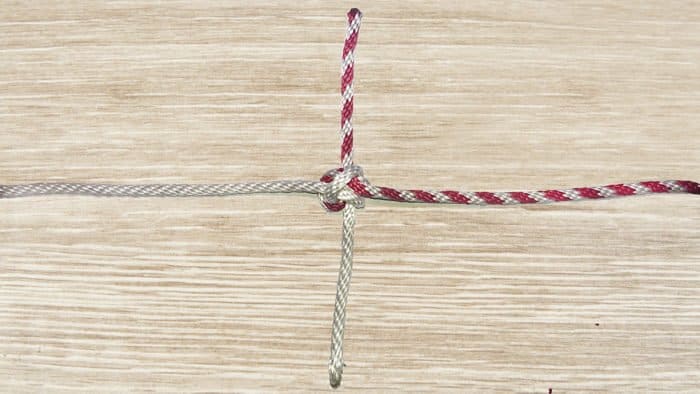
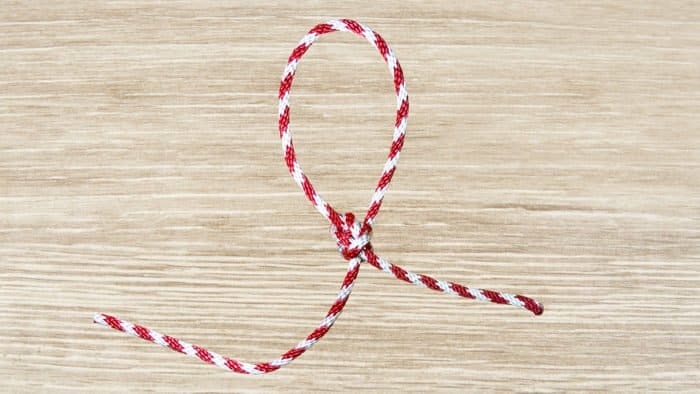
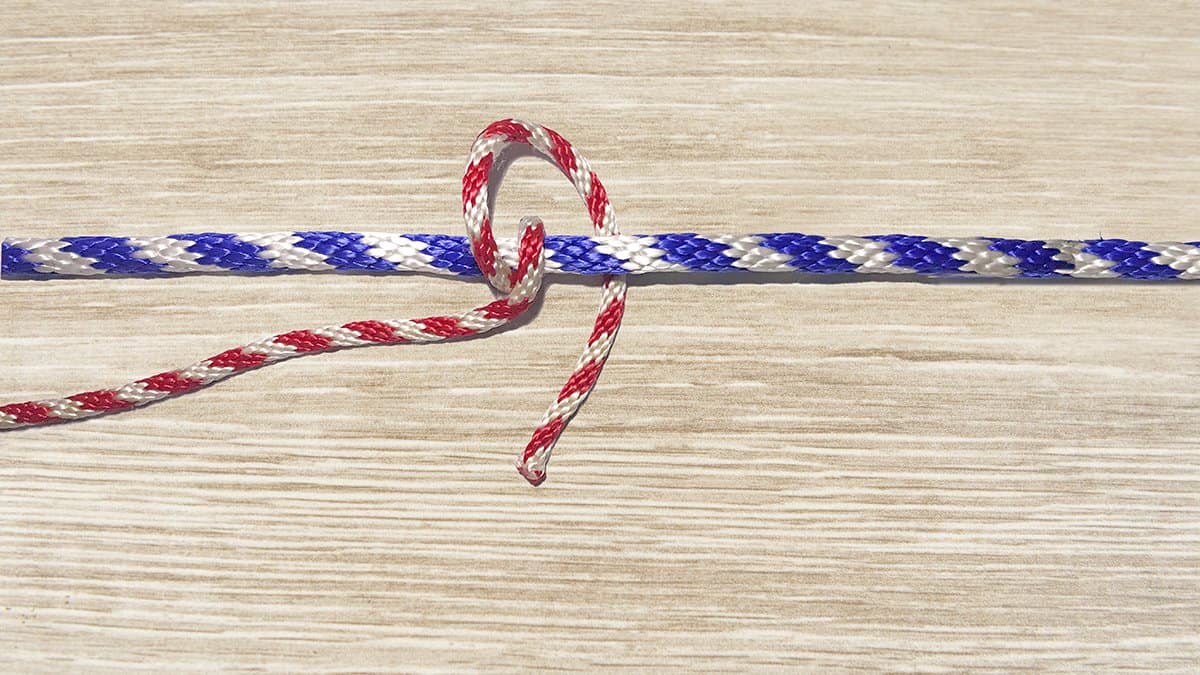
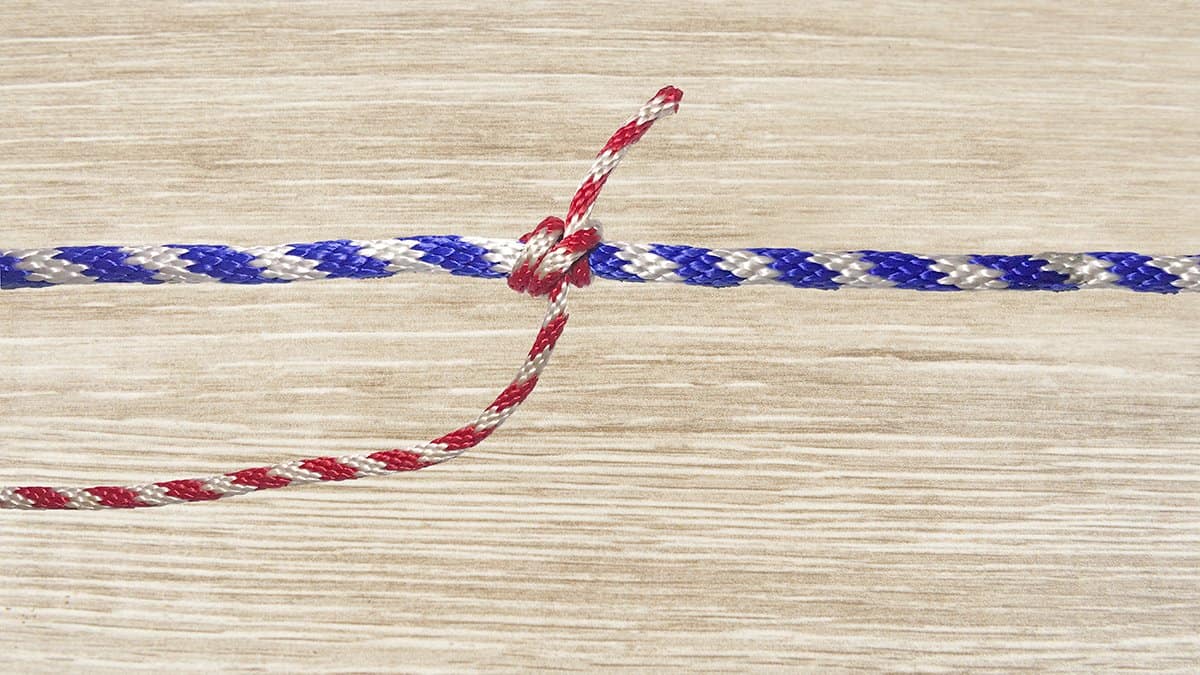
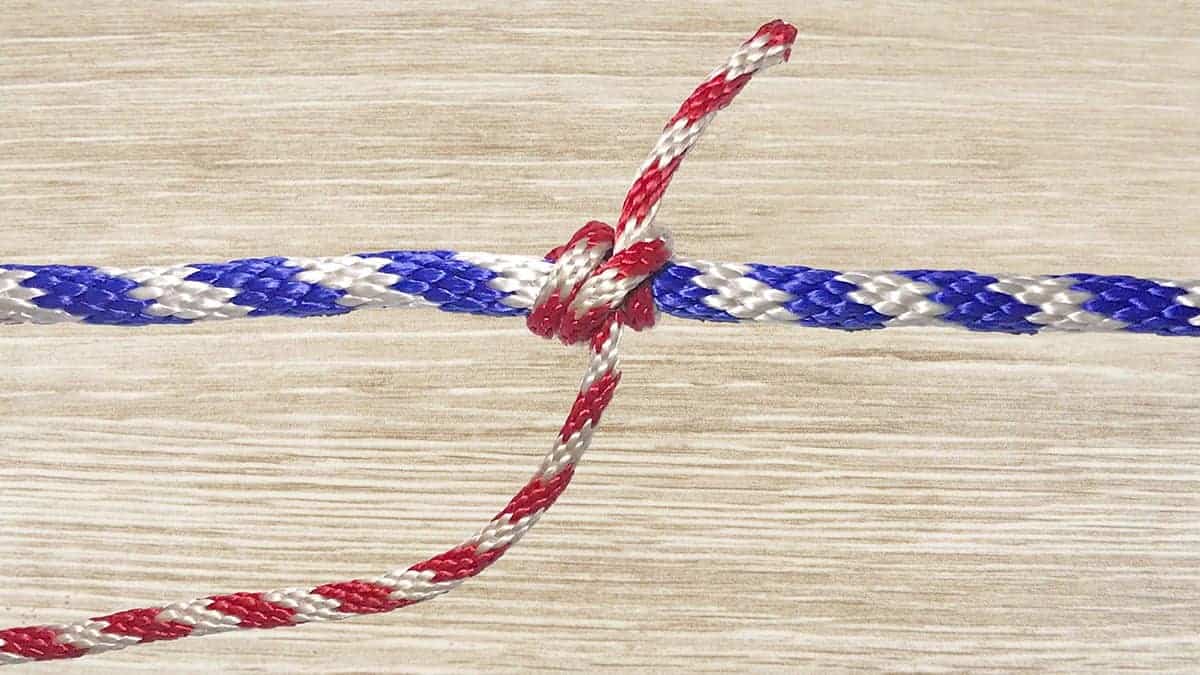
Step One: Wrap one end of your rope around your other rope or piling.
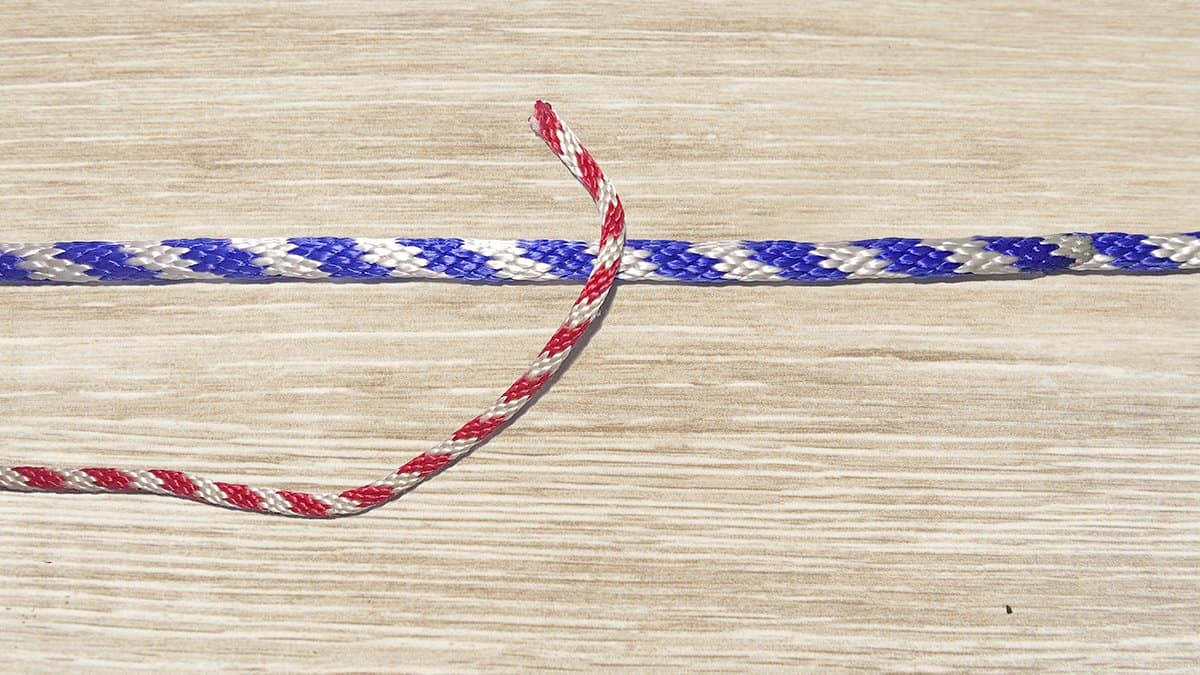
Step Two: Repeat the previous step, making sure you cross over the standing rope a second time.
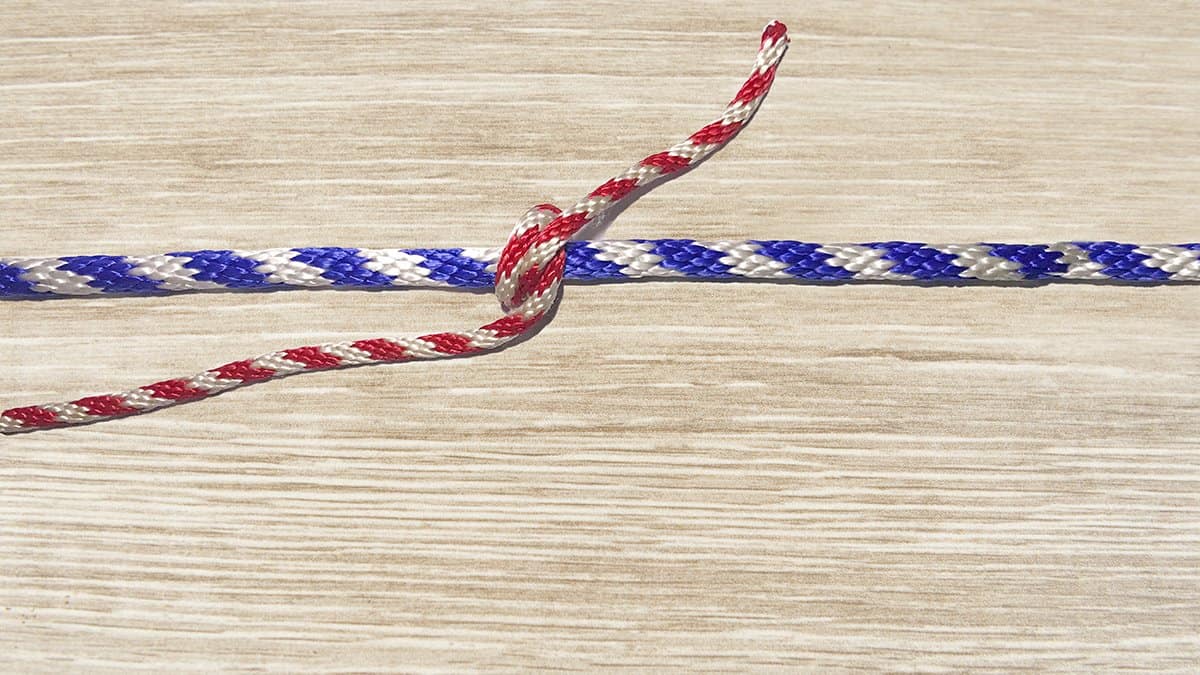
Step Three: Wrap a third time around the rope or piling, but this time make sure the wrap does not cross over the standing rope.
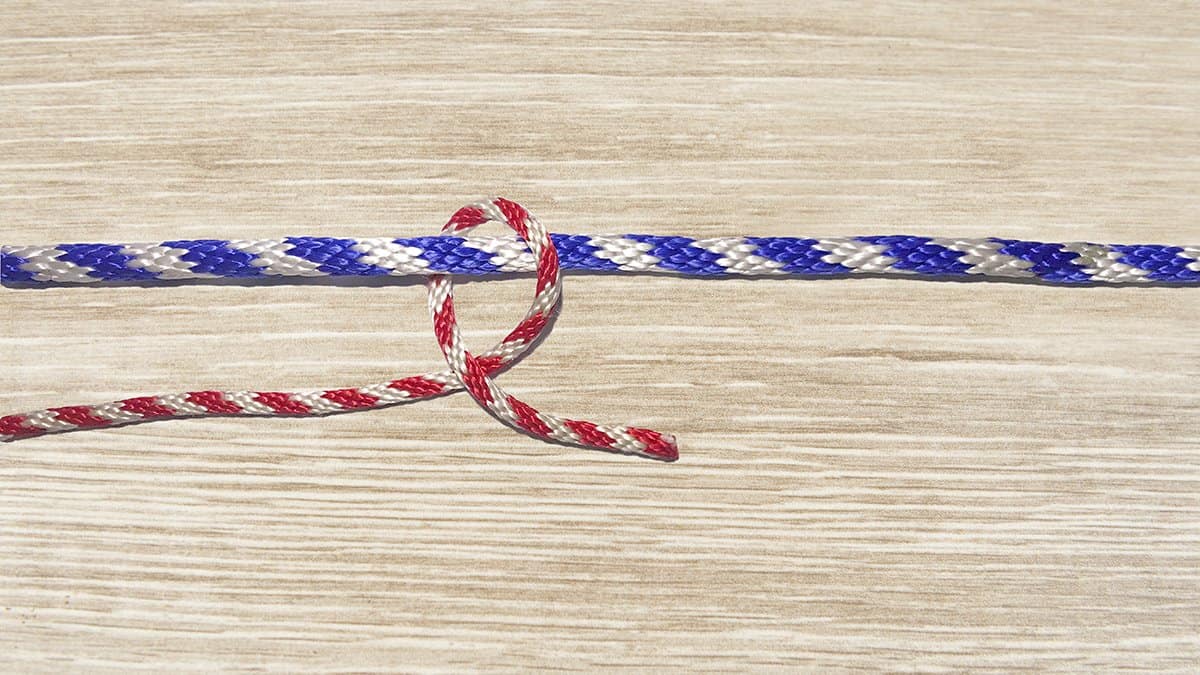
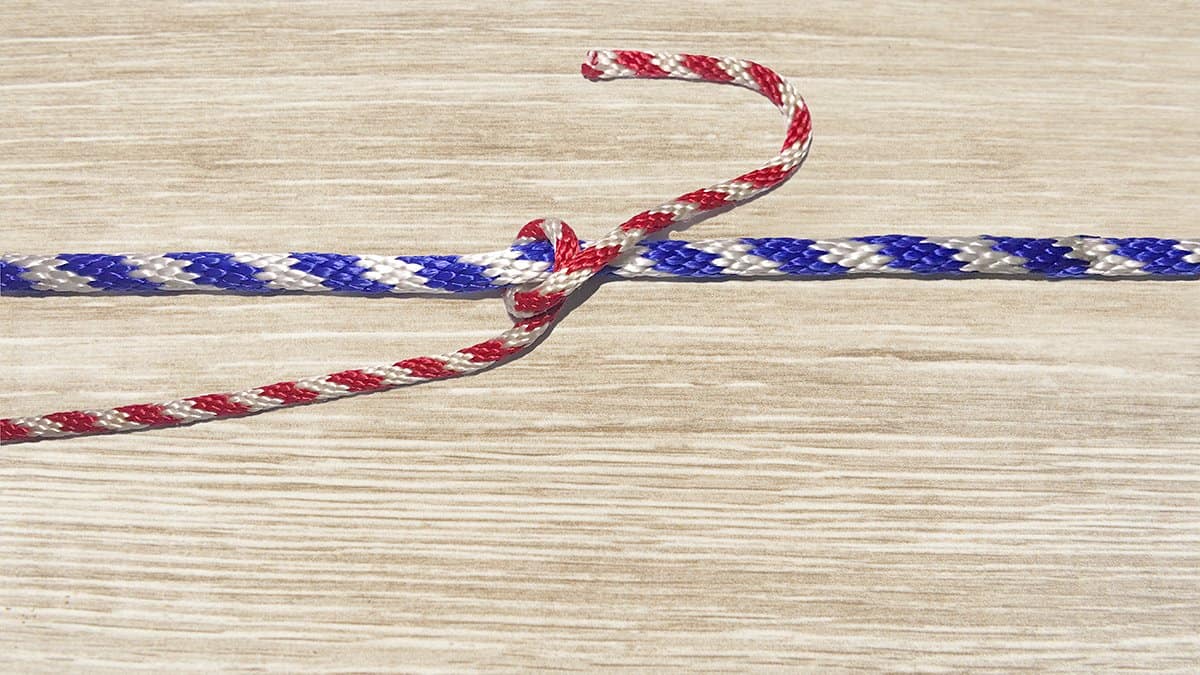
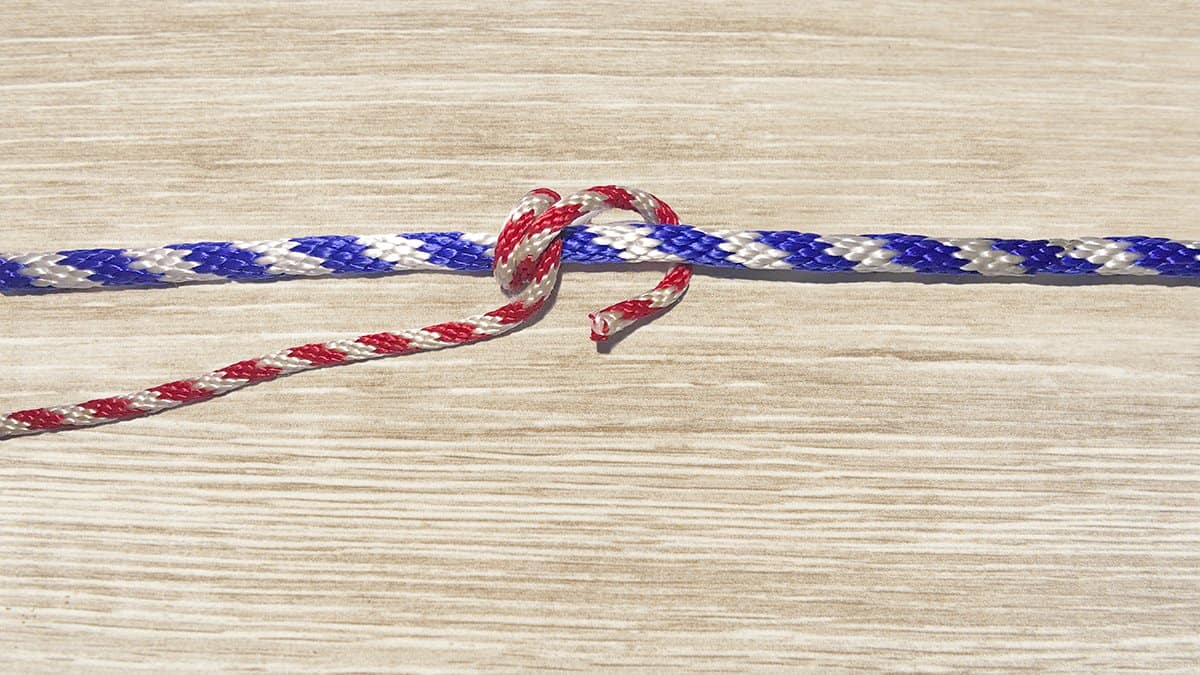
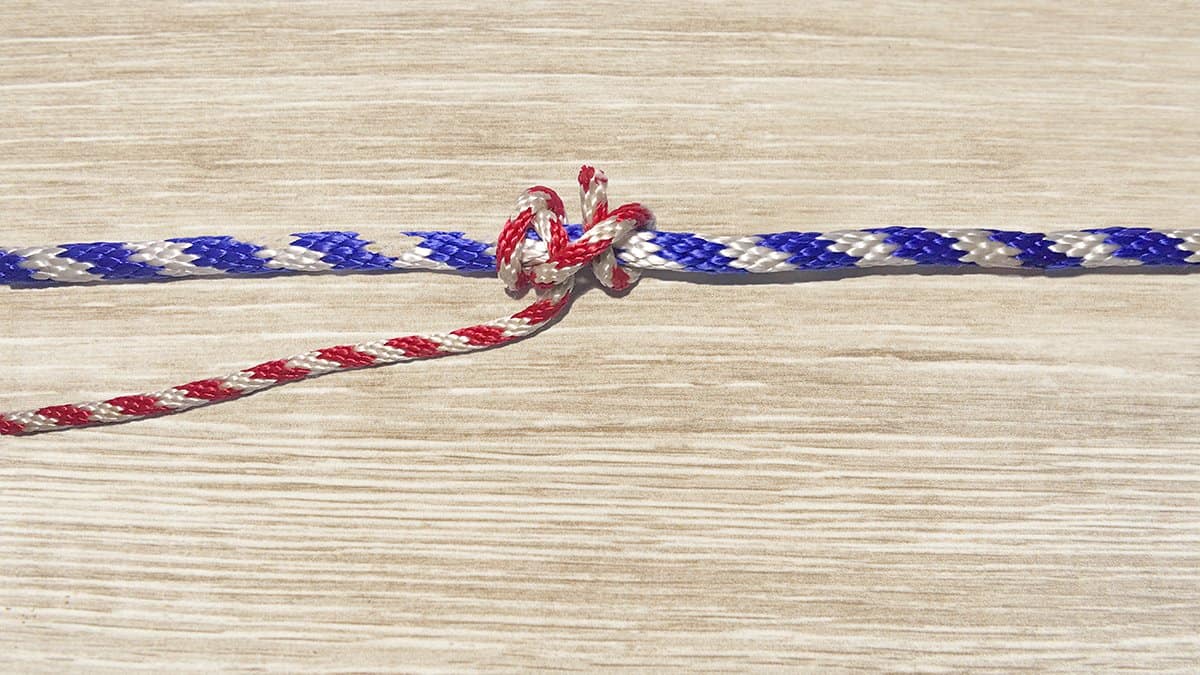
Step Four: Now pull the working end under the last wrap you made, and pull it tight to finish.
Other Things To Consider
Now that you know how to tie the Rolling Hitch Knot, there’s more to learn! Like most knots, the Rolling Hitch has a few quirks that you should learn about before you deploy it in the field. Plus, it’s always a good idea to learn about a knot’s variations and suitable alternatives too. Here’s some extra information for you to keep in mind!
Warnings
If you’re using a rope made from modern fibers, and especially if you’re joining a rope made from modern fibers to another line made of a similar material, you should take extra care. These modern ropes can be slippery, causing this knot to fail. If your ropes are made from Spectra, Dyneema, and some Polypropylene fibers, this knot may not hold. Keep that in mind when using this hitch.
Variations
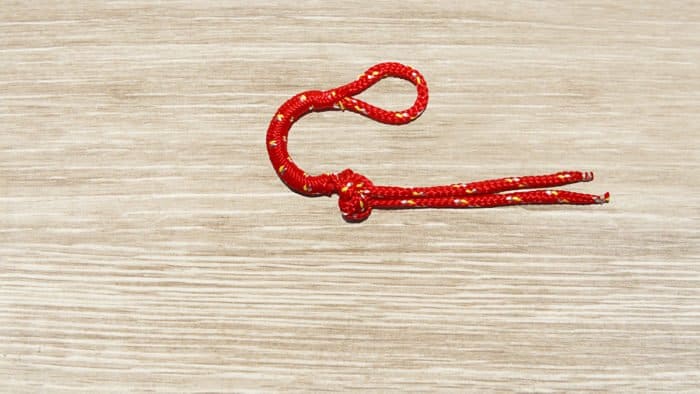
Variations of the classic Rolling Hitch Knot include the addition of a bite to the end. If you’re got a long tail end you can make a knot using a bight instead of having your working end hanging loose. The Rolling Hitch On A Bight can be made by not pulling the bitter end of the rope through one of the first wraps. It takes some practice, but it can make your Rolling Hitches much tidier and safer in the future. There are many other variations of the Rolling Hitch that you can learn if you feel the need!
Alternatives
As we mentioned above, there are countless variations. However, sometimes an entirely different alternative knot is a better choice than a variation. According to experiments conducted by Practical Sailor back in 2009, if you’re going to be using slippery rope, an entirely different knot is recommended. If you need a strong and secure alternative to the Rolling Hitch, the Icicle Hitch should be your knot of choice.
However, other useful boating knots that could replace the Rolling Hitch include the Gripper Knot, and the Clove Hitch.
Categories: Nautical Knots