How to Tie a Boat to a Dock
Published by Ian Fortey in Boats Last updated on February 6, 2023
Learning how to moor your boat properly is one of the basic skills you need to master if you’re serious about boating and boat ownership. You can’t stay out on the water all the time so you need to understand how to secure your boat when you dock in a way that ensures it’s safe, secure and going to be there when you come back later. Luckily, it’s not a vastly complicated process so we’ll cover it here in just a few steps for you.
Why Tying a Boat Properly is Important
Aside from the obvious reason for securing your boat – so that it doesn’t just float away – there’s a reason it needs to be properly tied up. Anyone can tie a knot and hope a boat stays put. But properly tying your boat will also keep it safe. If you don’t secure your boat the right way you are at a far greater risk of damage. Your boat is more likely to move and shift with the motion of the water and slam against the dock or even other boats. That can result in scratches, dents and damage to your vessel or someone else’s. That can also end up costing you a lot of money.
Make Sure You Have the Right Equipment
You can’t tie up a boat if you don’t have a few basic and necessary supplies. Literally every boating store should have what you need to properly secure your vessel. There are three key pieces of gear that will get you secured properly to any dock.
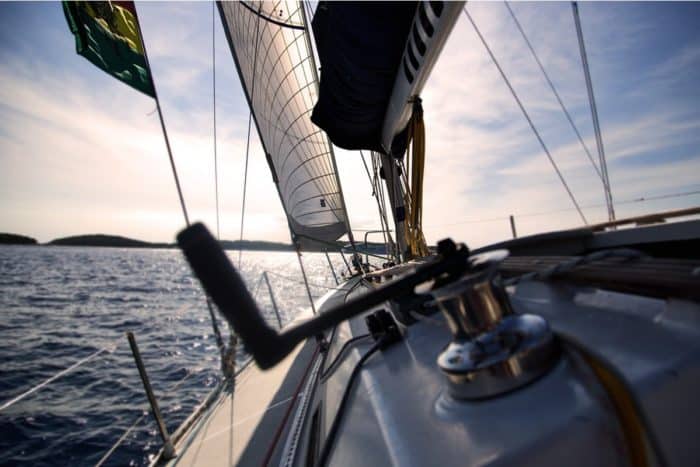
- Rope: There are a lot of options for what kind of lines you could use on a boat but you should look into some nylon rope. It’s easy to use, effective and doesn’t cost too much. Nylon is strong but also flexible and that’s important when it comes to mooring a boat. Your lines need to have give or else they can cause more damage or end up breaking. You’ll want something tough, like double braided or three-strand. Obviously your boat can help determine what will work best as a small jon boat won’t need rope that’s as sturdy as a yacht. Make sure the rope you’re using is specifically designed for marine use.
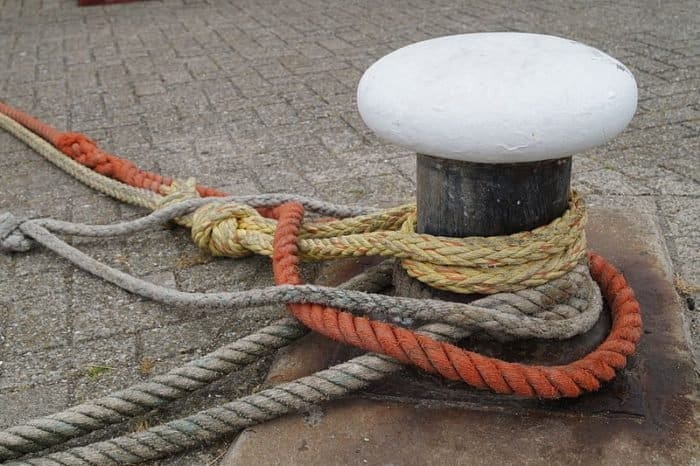
- Cleats: Cleats are T-shaped and usually made of plastic, galvanized metal or even wood in some rare cases. They’re T-shaped to allow for rope to be looped around the base of the T to secure it in place. You’re going to want to have cleats on both the port and starboard side of the vessel and you need a minimum of three on each side. The dock may have cleats as well but this isn’t always the case. Sometimes you’ll have to tie your boat to the pilings on a dock, which are the wooden support poles on either side. It’s always a good idea to regularly check the hold of your cleats to make sure they’re firmly secured to your boat. Having a toolbox on board with a screwdriver to tighten them down when necessary is important.
- Fenders: Also called bumpers, these are essential for preventing damage to your boat once you have it tied up. They come in various sizes and shapes depending on the size and type of boat you’re docking and are made of foam, rubber or plastic. A 20 foot boat will likely be best served by 3 fenders but a 50 foot boat would need at least 5. The diameter of the fenders will increase as well
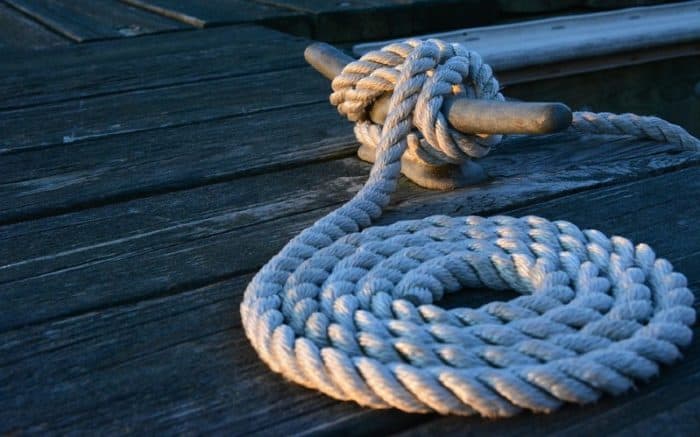
Learn to Tie a Cleat Hitch
The knot you’re going to use to secure your boat is called a cleat hitch or a cleat knot. It’s simple and effective and once you have it down it makes docking and tying your boat down a lot easier. This video gives a great and easy demonstration of how to tie the knot.
Remember, start at the horn of the cleat that is furthest from the pull on the line and go around the clean then bring it up over the top. Go around the horn to create a figure 8 in the rope and bring it down, flip the line under itself in a half hitch, and loop it back around the other horn. If it sounds complicated, just watch the video again and try it a few times until you get the hang of it. It will only take a few seconds once you have it mastered and it provides an exceptionally strong and reliable hold.
When securing lines, make sure every line runs at an angle away from the boat and never straight across. Lines should never be at a 90 degree angle to the dock. This allows the boat to still move with the motion of the water. The flexibility in the rope will ensure it moves back and forth, up and down, as much as possible in the limits of how it’s secured, rather than slamming against the dock and with less stress overall. If the lines are straight from dock to boat, you risk damaging the cleats, the rope and your vessel.
If a straight line is tied, called a breast line, then the rising and falling of the tides and also waves or wakes can cause havoc with your boat.
Step 1: Preparation of Your Dock Lines
As you’re approaching the dock to tie your boat up you should have your fenders already dropped and in place. Your lines should be around your cleats and ready to be deployed. That means no knots or tangles. Then you can maneuver your boat into position.
Step 2: Get Your Spring Line, Stern Line and Bow Lines Ready
Once someone on the dock is ready, toss them the spring line. Spring lines are going to keep your boat from moving backward and forward along the side of the dock. If the wind blows parallel to the dock, it will push your boat back and forth so you don’t want that.
Forward and aft springs are the two kinds of spring lines you’ll use, sometimes also just called stern spring and bow spring. They start at either the bow or stern and run a third of the length of the boat up towards the dock cleat forward or aft of the boat.
A spring line attached to a middle cleat of the boat can be tossed to someone on the dock and can be used by that person to temporarily hold your boat in place while the rest of the lines are secured.
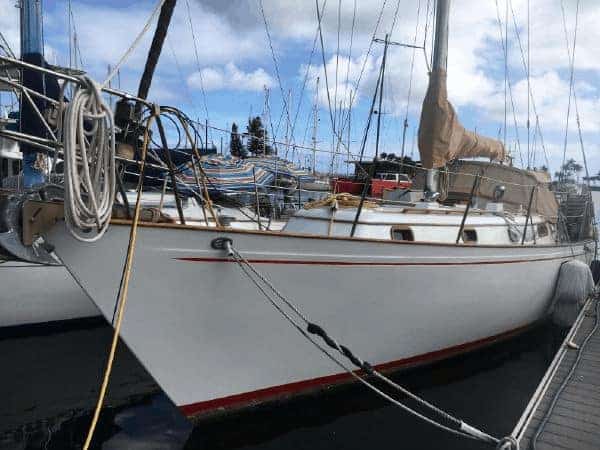
Step 3: Secure Bow Cleat to a Dock Cleat
Use the cleat hitch knot demonstrated above and secure the bow line to dock cleats or pilings ahead of the bow. Then the spring line can be secured to a cleat towards the aft of the boat. With these two lines secured, the boat will be prevented from moving back and forth.

Step 4: Secure Stern Cleat to a Dock Cleat
Like the bow cleat, the stern cleat needs to be secured as well, this time to a cleat that is behind the stern. With the bow and stern tied off to cleats at the fore and aft of the boat, it creates tension to hold the vessel in place that prevents it even further from moving back and forth. You can also secure a second spring line at this point in the opposite fashion of the first spring line, this one going from the middle cleat, or the middle cleat closest to the stern, towards a dock cleat nearer to the bow.
Step 4A: Secure Opposite Side if Applicable
Not every dock will allow for this type of set up but if you are in a slip with a dock on either side, you may be able to tie lines from your starboard and port cleats. If this is an option you can secure both sides of the vessel in the same manner.
Temporarily Tying Your Boat to a Dock
If you plan to only dock the boat for a short time, you may not need to engage in such a complicated process. In this case, if it’s a quick stop, you can also use a simple cleat knot to hold you boat in place.
A simple cleat knot requires you to make a loop out of the rope and push it through the hole in the cleat. Then, once the loop is trough, open it up and pull it over the horns of the cleat to secure it in place. This is extremely easy to do (and undo) and offers a secure hold. It’s not nearly as strong as the more complex cleat hitch, of course, and that’s why it’s best used for those temporary stops when you plan to get back on the boat fairly quickly.
Changes to How You Tie a Boat to a Dock
There are certain circumstances that may alter how you tie your boat to the dock. These are not everyday occurrences and you’ll have to play things by ear as to whether or not they are relevant.
Tides
Tidal shifts can alter where a boat sits relative to the dock considerably, sometimes more than you’d realize. The proximity to shore, the side of your boat, the dock itself and other considerations can make this more or less of a concern so it’s a good idea to be aware of how the tides affect you and where you plan to dock.
If the tide coming in or going out is significant, you need to make sure you have appropriate slack on your lines. To a lesser degree this will also be relevant if you are docking near where many boats may be passing and creating a significant wake that can raise and lower your vessel in the water. You never want your lines so tight there is no give as this could put too much strain on the cleats and cause damage. Keep in mind, if you are tied to a floating dock, the dock line will keep both your boat and the dock moving together.
Time
We covered above that you can use a more simple knot if you want to dock for just a short period. On the other hand, if you plan to stay longer than it’s always a good idea to secure an additional line or two for security. An extra spring line can help keep your boat stable for a longer period since you won’t be able to predict what conditions it will endure over such a period of time.
Weather
If bad weather and wind are incoming you may want to tweak your approach in terms of tying your boat to a dock. If a strong wind is blowing towards the dock, it’s best to angle your boat a little further away from the dock and tie off accordingly. On the other hand, if the wind is blowing away from the dock, you may want to stay a little closer, parallel to the dock itself.
The Bottom Line
It is a relatively simple process to tie your boat to a dock once you get the hang of it. So long as you have the right materials and are aware of how to properly tie a cleat hitch it should be easy and come as second nature once you get the hang of.
Remember to always use a nylon rope designed for marine use that has flexibility. You need a certain amount of slack on your lines to reduce any potential damage, as well as boat fenders or bumpers to prevent scrapes and dents from damaging your vessel. Finally, make sure you are securing your boat properly with the right amount of lines and knots for the time you plan to keep it at the dock.
Categories: Boats, nauticalknowhow


1 Comment
Captain Brandon on May 30, 2023
Don’t use a cleat hitch. They look nice and neat, but can actually be dangerous. To make a cleat hitch and remove them requires you to put you fingers in the line. If your boat should surge (be it from weather, another boats wake, somebody accidentally engaging the throttle, or any other reason) your fingers can become trapped. You could even loose them…it’s happened before.
Whe you need to secure to a cleat simply make a full round turn (this puts all the load on the throat of the cleat, which is the strongest part), and then make 2 or 3 figure 8’s. Finnish with another round turn.
Coil or Daisy chain any remaining line to keep it out of the way.
This method will NEVER come loose without someone physically undoing it, and it will keep your fingers safe!