How Do Fish Finders Work?
Published by Ian Fortey in Fishing Last updated on December 29, 2023
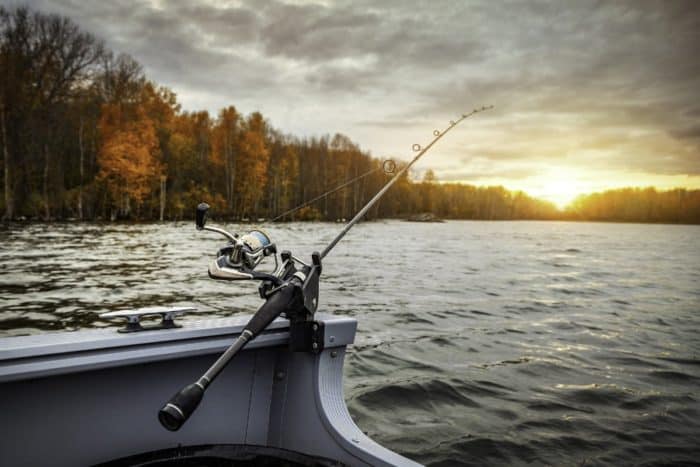
Modern fish finders have been the real benefits to anglers. Whether you ‘re ice fishing, saltwater fishing, or just going downriver in a bass boat, they help a lot. The way fish finders work is worth understanding. In order to get to the bottom of how fish finders work, you need to know a little bit about sonar technology. This can help you better read a fish finder. And also it never hurts to understand the technology you’re using.
How Does a Fish Finder Work
A fish finder works thanks to sonar technology. Sonar stands for SOund NAvigation Ranging. It sends sound waves into the water in the form of pulses or pings. When the sound waves hit something, the sound is reflected back. This is exactly the same way a bat will hunt in the air.
On your boat, the sonar device is able to calculate distance. It does this by measuring how long it takes the sound to reflect back. As it continues to send out the sound bursts, it can get an over all picture of what’s happening. In that way it can map the bottom structure of the water that you’re on. You’ll be able to see not just fish, but the vegetation and rocks as well. It can even tell you what kind of object is underwater to a certain degree. When the signal returns strongly it means it hit something hard. If the return signal is a weak one, then it hit a soft object.
Unlike light, sound doesn’t travel just in straight lines. Instead, you are sonar burst comes out in a cone-shaped. From the point of origin, which is your boat, it spreads out in a cone shape underneath your boat. This can be controlled by changing the scanning beam frequency of your sonar.
What is a Transducer?
Let’s say you’re going to break down a fish finder into its most important parts. A fish finder consists of a transducer and a processor. The processor is the computer that interprets the sonar data gathered by the transducer.
The transducer works by vibrating piezoelectric crystals. These vibrations send the pulses into the water. As we’ve already said, those pulses return and vibrate the crystals again. That information is then interpreted by the processor. It’s then displayed on your monitor so you can get a picture of the world beneath your boat.
A wide beam is good for scanning a large area. The angle on this is probably between 40 degrees and 60 degrees. Wide beams are good for a basic picture. However, they do lack detail. You want to use wide beams in more shallow water.
A narrow sonar beam is around 10 degrees to 20 degrees. This is much closer to a straight line than the wide beam. But it’s still a cone and we’ll spread out in the deep water. However, the narrow beam provides greater accuracy and more detail. The trade-off is that it covers a smaller area. Once you have located an area with fish using a wide beam, a narrow beam can give you more precise information.
The sound signals that are returned to the unit are then displayed on the sonar screen. This lets you have a visual representation of what’s happening under your boat.
When sound signals return to your sonar, the sonar sends out another pulse. Depending on the kind of sonar you have you could be sending out pulses up to about 15 times per second.
Different transducers are going to produce different frequencies. For sport fishing you’re going to see frequencies between 50 kHz up to 300 kHz. 200 kilohertz tends to be the standard. Something like a CHIRP transducer will operate between 150 and 200 kHz in freshwater.
Depending on the kind of transducer you have, it could be mounted differently as well. Not every transducer actually needs to be in the water. In-hull transducers can be mounted inside the boat. The frequency will travel through the hull and into the water. Obviously you’ll need to do your research before buying something like this. Not every transducer works this way. And even those that do can’t transmit through every kind of hull.
A trolling motor mount transducer works inside the water. As the name suggests they can be attached to the side of a trolling motor or in the propeller hub. There are also transom mounted transducers. These are the most commonly seen kind. They’re attached with an adjustable bracket on the outside of your boat’s hull. A transom mount is the easiest kind to use and to adjust stop.
Types of Fish Finders
Sonar is not one single kind of technology. There are actually three different types of sonar technology. These are all used in fish finders. Each one provides a different experience and can be used slightly differently.
2D Sonar
This is the oldest kind of fish finder available. The 2D sonar that it uses sends the sonar signal out on a single band from a round transducer. Modern fish finders that use 2D sonar can offer clear images. You just have to make sure you using something like dual spectrum CHIRP sonar.
CHIRP Sonar
CHIRP sonar is a kind of 2D sonar. It has widely replaced the older, less reliable kind of 2D sonar that only used a single frequency. CHIRP became a viable option for fish finders around 2009 or so.
In a 2D or CHIRP sonar you have round transducers. The result is a sonar signal that radiates from your boat in a round sonar cone.
Sonar works best when it sends out signals across more than one frequency. That is what CHIRP sonar is. CHIRP stands for Compressed High Intensity Radar Pulse. Original fish finders only used a single frequency band. This greatly limited what they were able to see when in operation. Because CHIRP scans across many frequencies, it gives you a more detailed picture. High frequency and low frequency are covered. The end result is a much more detailed picture. Once you learn to read sonar, CHIRP images are easy to interpret. The detail is enough to help you find fish, weeds, and more.
The difference is readily apparent on the sonar display. If you were to use a traditional single-band sonar next to a CHRIP sonar you would see. The images on a single band are much harder to interpret. There’s a lot of fuzz and poor resolution. CHIRP sonar is able to tighten images up much better. If you’re looking for game fish, this is a great kind of sonar to use. That’s especially true if it’s closer to the boat.
The downside of these kinds of sonar, sometimes even older CHIRP sonar, is that detail can be lacking. Modern CHIRP sonar is superior to older 2D sonar, however.
Down Imaging Sonar
Newer sonar units will use down imaging sonar. Instead of the circular unit of a 2d sonar, these use a rectangle. The rectangular transducer sends a narrow frequency sonar beam into the water. The result is, as we’ve seen, more detailed imaging.
Down imaging sonar is superior for getting tighter, more detailed images. You can focus it on individual fish with down imaging, for instance. The obvious disadvantage is that you have narrowed your field of view.
Side Imaging Sonar
Side imaging sonar works similar to down imaging sonar. The difference is apparent in the name. While down imaging sonar points straight down, side imaging points to the sides. It can be directed to either side of your boat. It offers a wider field of view than down imaging sonar does.
The big benefit of side imaging is that large area that you can see. It will help you pick out any notable structures under the water. In particular rocks and trees and weed beds will become clear. The downside is that it’s not very efficient at picking up smaller things in the water.
Every kind of sonar has advantages and disadvantages. That’s why we recommend combining them. This is almost always the best option.
How to Read a Fish Finder
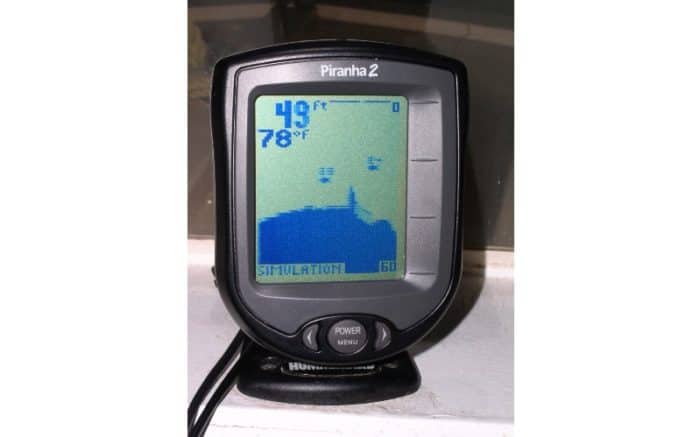
Fish finders unfortunately don’t just offer you a snapshot of the water. It’s not like looking at a camera. The imaging sonar makes a picture that needs to be interpreted. If you are new to imaging sonar, then you may not understand what you’re seeing. The images and colors can be confusing.
Fish-ID Technology is something that many modern fish finders make use of. Rather than forcing you to try to interpret what you see, the fish finder does it for you. Fish-ID technology replaces the image on your screen with a fish icon. Older fish finders could sometimes be hard to interpret. You’d see a blur of color on the screen and it could have been a fish or it could have even been your bait in the water. Fish-ID technology clears that problem up for you.
Beyond fish, the same technology produces icons to differentiate other things. Objects like plants, rocks, and even a fish school will have easy to read icons. The technology isn’t perfect by any means. More than one angler has cast into what the fish finder said was a school of fish, only to find out that it was weeds. Technology is never perfect. But if you make use of several kinds of sonar, it can limit this.
Big Fish vs Small Fish
Other kinds of fish finders represent fish as arches. Fish arches come in sizes that correspond to the fish themselves. A big fish arch means a big fish. A small fish arch means a small fish. It takes a bit of practice in order to understand where fish arches begin and rocks and weeds end.
If you have a wide arch with vibrant color and then you likely have a large fish. A small arch with not a lot of color will be a smaller fish. Nine times out of 10 you can rely on that being the case.
Fish finders won’t typically show you how long a fish is. But it may be able to give you a good idea of the width of the fish. If you take a look at the width of the fish arch, you’ll get a good idea of the size of the fish. That’s a good rule of thumb if you’re using this kind of fish finder. Pay attention to the fish arch instead of the overall size.
You’ll see a full arch if the fish swims through the entire sonar cone. If it only it’s part of the sonar column and then you’re going to get a half arch. If you’re new to fish finders, you might think a half arch means a small fish. Obviously that’s not the case. It just means it wasn’t caught in the full sonar cone.
You can even use a fish finder to find bait fish. These small fish are usually just tiny dots or dashes. They’ll be suspended in water so you know they’re not weeds or rocks on the bottom.
Fish Finder Colors
The different colors that you see on your fish finder image have different meanings. If you’re using Fish-ID, under the narrow frequency band you’ll see fish arches show up as an orange color. Under a wider band they will be a blue color.
Color palettes can be changed depending on preferences and the brand of fish finder. For instance, the soft bottom on some fish finders may be orange in color. Harder surfaces will show as a darker color getting up to purple, blue, and even black. You have the option to change this color palette in many models, however.
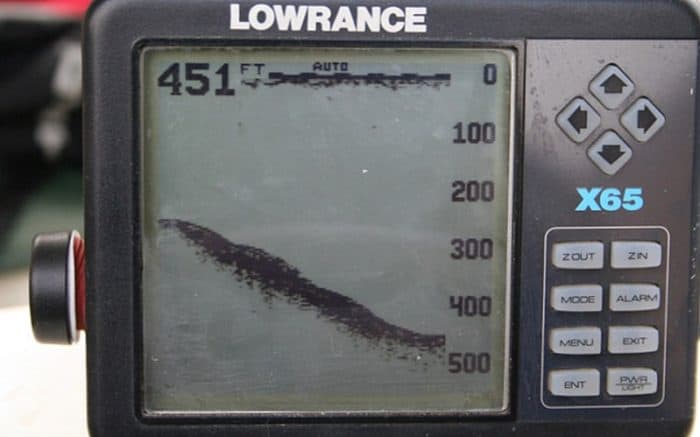
There are also fish finders that don’t display in color at all. In some models you just have to rely on the gray scale black and white to interpret images. In either of these cases, it’s still fairly easy to interpret what you’re seeing. Darker colors are things that return stronger echoes. So fish, the seabed, rocks and plants will come back as black.
Limitations of a Fish Finder

Obviously, a fish finder helps you see what’s going on in the water. It’s not a crystal ball, however. There are places that a fish finder will not be able to help you see. In particular, things right below the surface are often hard to make out.
Surface clutter is a kind of sonar noise that happens near the surface of the water. The water actually reflects some of the sonar waves all by itself. Because it’s right on the surface next to the sonar, it happens very quickly. The sonar signals bounce back to your sonar unit and essentially confuse it. This will happen frequently on choppy water or water with a strong current. When that happens, this area becomes impossible for the sonar to interpret. As a result, you’re going to have a blind spot.
High-frequency sonar is able to cut through a lot of clutter. It may not be completely eliminated, but it can reduce it. Remember, high-frequency sonar uses those narrow beams. You can cut through the clutter much better than regular sonar.
Another thing to be aware of with sonar is what happens when it reaches the bottom. If it starts detecting weed beds and such on the bottom, it will mark that as the bottom surface. If they are are different levels, however, your sonar may miss them. It will have set what it detected as the bottom as the bottom of your screen. That means there could be more that’s deeper that you’re going to miss out on. This is sometimes called a dead zone. It happens in deeper water that your sonar it’s just not displaying for you.
Once again, a narrow beam can help fix this problem. The sonar will scan with a narrow beam and be able to pick up that drop off.
Fish Finder Batteries
Choosing the proper batteries for a fish finder requires a bit of research. Since you need to have reliable power, you need a good battery. A poor battery can run out remarkably fast on a fish finder. You want to make sure yours is going to last for your entire fishing trip.
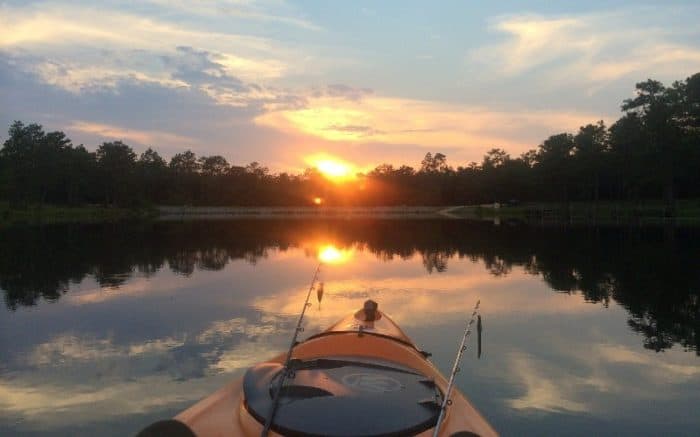
Your best fish finder batteries are going to be something like a 12 volt lithium battery. Expert Power makes a 12v lithium iron phosphate battery that works very well. It’s quite a bit lighter than other batteries in its class. And it will last a lot longer. Let’s say that you’re using a fish finder and something like a kayak. You could probably go for 3 trips before you need to recharge the battery.
Obviously a rechargeable battery is what’s going to make a fish finder work best. Keep in mind that some SLA rechargeable batteries dwindle more quickly. They will only last for a few hundred recharge cycles. Many don’t even make it to 500 recharging cycles. The Expert Power 12 volt lithium battery can go between about 2,500 to 7000.
This is just one example of a quality fish finder battery. But as you can see, it can make a big difference if you choose the right one or not.
Modern Fish Finders
If you used a fish finder when they first came on the market, you had a very limited experience. A new fish finder will have a lot of additional abilities that traditional sonar did not. These extend well beyond the scope of simply allowing you to identify fish under the water.
A top-quality modern fish finder can give you plenty of additional information. Things like;
- A depth finder. With a depth finder it can be helpful to set a depth alarm on your fish finder. If you’re looking for a certain kind of fish at a certain depth, you can set the fish finder to ignore more shallow water. That way you’ll be able to get where you want to go faster. And you can do it without spending time checking the fish finder every few minutes.
- The temperature of the water. Certain fish prefer a certain temperature range. Some will be in the middle of the water column at a certain temperature, others will be much deeper. This can be very important when you’re ice-fishing if you want to discover where the fish are hanging out.
- GPS coordinates for your boat. As we’ve discussed, there are many benefits to having GPS integrated into a fish finder.
- The consistency of the bottom, location of weeds, trees, and more. The clearer the picture of the underwater world you can get, the better. Not just because it shows you where the fish are right now, you can get an idea of where they might be as well. Certain fish prefer to stay around the weeds, for instance. If you can find a weed bed, you’ll know that this might be a place you want to look. Likewise, if there are sunken logs or wrecks, these can also attract certain kinds of fish that you may be after.
A fish finder GPS combo can really help you catch fish. When you integrate the two technologies, you can navigate a body of water more easily. That way you can find specific points on a map. That includes the perfect fishing spot. Once you know the coordinates, you can go there every time. You don’t have to worry about fussing with two separate pieces of technology.
When you have GPS integrated with your fish finder, you can also drop GPS markers. If you have a chartplotter as well as GPS, you’re even better off. This will allow you to make your own maps of any given body of water. You’ll be able to determine for yourself which areas have the best fish. You’ll also be able to differentiate between game fish, bait fish, and other things.
In order to get the most out of a fish finder with GPS or a chartplotter, you’ll need some navigation software. Fortunately, there are many kinds available. Things like Lakemaster, for instance. Once you get used to using them, they could really improve your overall fishing game.
The Best Fish Finder on the Market
There are several factors that are going to affect the kind of fish finder that works best for you. The kind of boat you have, where you’re going fishing, even when you’re going fishing can affect this. Ice fishing is a whole different ball game, after all.
The best fish finder models are going to combine several times with technology. You want to make the most of down imaging, side imaging, and CHIRP sonar. If you can incorporate GPS and chartplotting as well you’ve got a solid set up.
The trade-off here is something this complicated is going to cost more money. Some more advanced fish finders can cost many hundreds of dollars. Some units can get well over $1,000. This is obviously a good investment if you’re a serious angler. However, if you only go fishing once or twice a year on your kayak, it’s probably not worth it. You want to invest in something practical, but budget-friendly. You could still get some very effective fish finders that don’t have to cost you a ton of money. In fact, there are some on the market that will cost you under $100.
The Bottom Line
Understanding exactly how to use a fish finder properly can go a long way to improving your fishing game. Very few models are intuitive right out of the box so ever. Make sure you check it out the manual that comes with your fish finder. You can check out videos online but should be able to walk you through the process easily as well.
Most fish finders don’t give you a thorough explanation about how they actually work. Now that you understand a little bit about sonar technology it will make it easier to use a fish finder. Knowing how the transducer works, and why it works the way it does, is important.
Categories: Fishing