How To Tie A Timber Hitch Knot
Published by Joe Appleton in Nautical Knots Last updated on July 12, 2022
If you’re used to handling cargo, then you should already know how to tie a Timber Hitch Knot. This knot is an efficient and practical knot that can be used to tow objects. Whether you’re floating timber down a river or hauling heavy loads overland, the Timber Hitch Knot won’t let you down.
The Timber Hitch is easy to tie but it’s even easier to untie! It relies on tension for security, so when you’ve finished hauling your load, the knot will become loose and very easy to undo. In fact, the Ashley Book Of Knots describes the knot’s untying process as: “very convenient, as it practically falls apart when pull ceases.”
If you need a practical knot to help you shift a heavy load, this is one worth considering. It’s an incredibly practical knot!
Uses
The Timber Hitch, as you can probably guess by the name, is a hitch that’s designed for easy log transportation. It can be used to tow and haul logs, on water and on land. Professional timber movers secure this hitch near the center of the log, with a separate Half Hitch Knot dropped over the end of the log to keep it secure.
It can be used for more than hauling timbers. The nature of the knot makes it ideal for securing a rope around any cylindrical object, such as a post, piling, tree trunk, or anything you can think of. It won’t jam and it won’t slip either, even under the heaviest of loads. It can also be tied and untied with tremendous ease.
Often referred to as the Bowyer’s Knot, the Timber Hitch has other uses. It gets its alternative name due to the fact that it’s also the same knot used to attach a bowstring to a longbow. It can also be used to attach strings to some musical instruments, such as ukulele, mandolin, and guitar variants.
Now you know what it’s used for, it’s time to learn how to tie a Timber Hitch Knot!
How To Tie A Timber Hitch Knot
You’ll need a log or piling to help you tie this knot properly. Grab a rope and a log, and get ready to tie your first Timber Hitch!
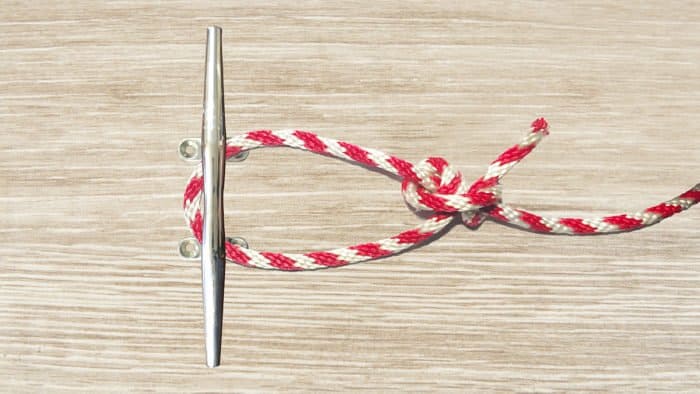
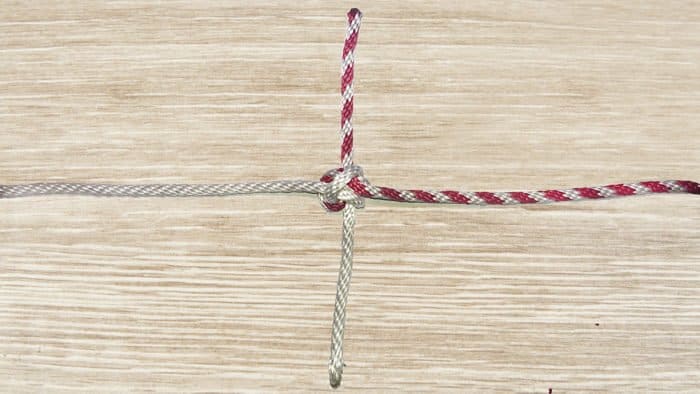
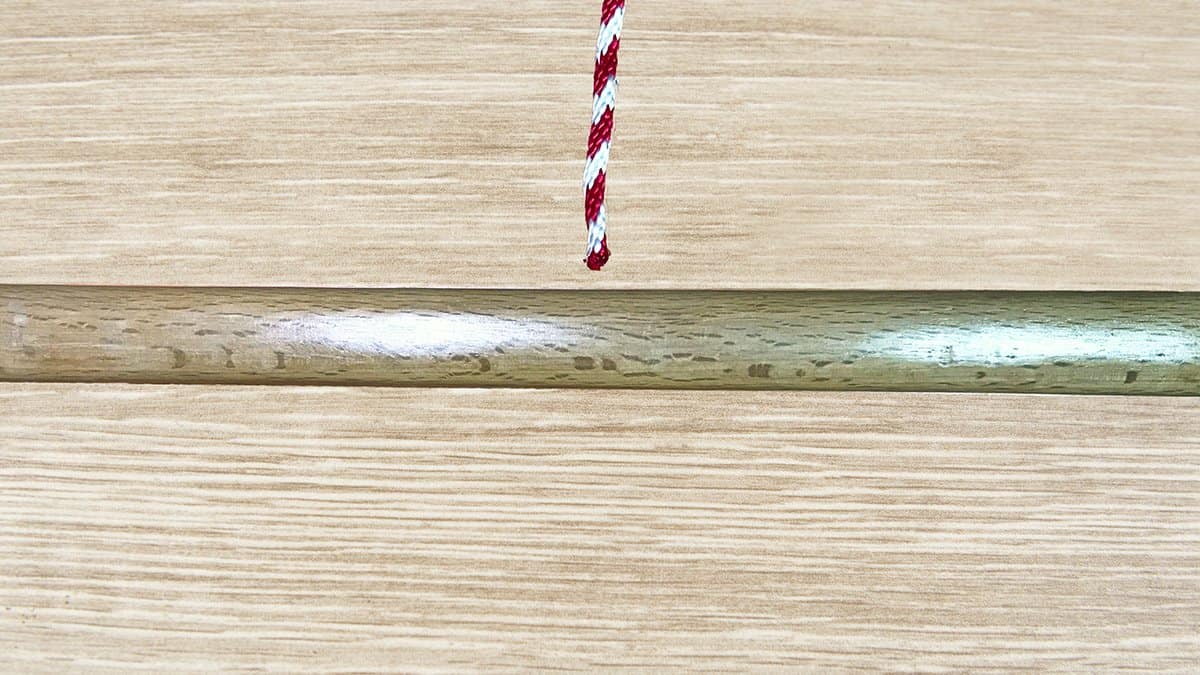
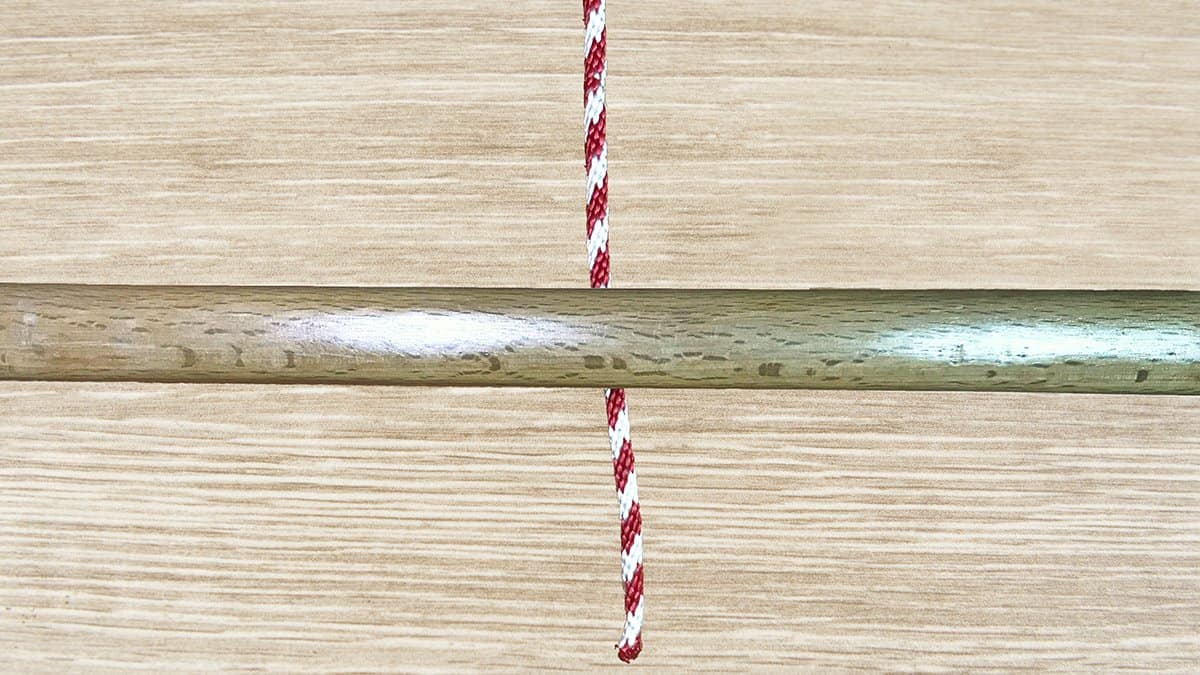
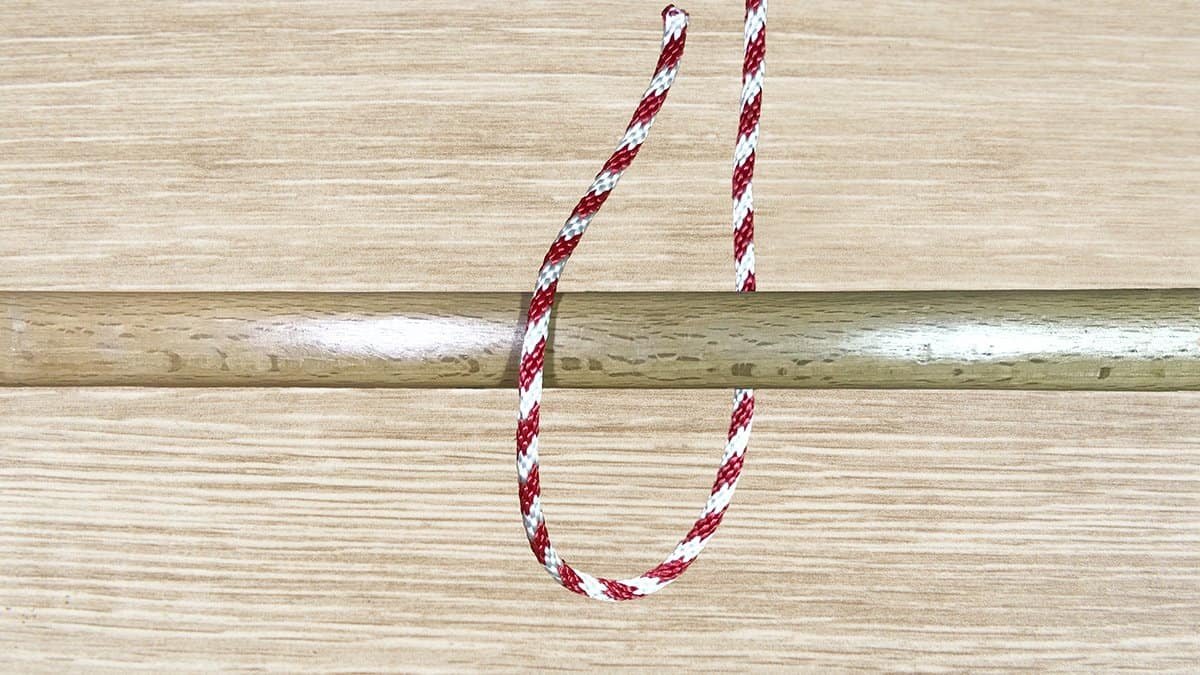
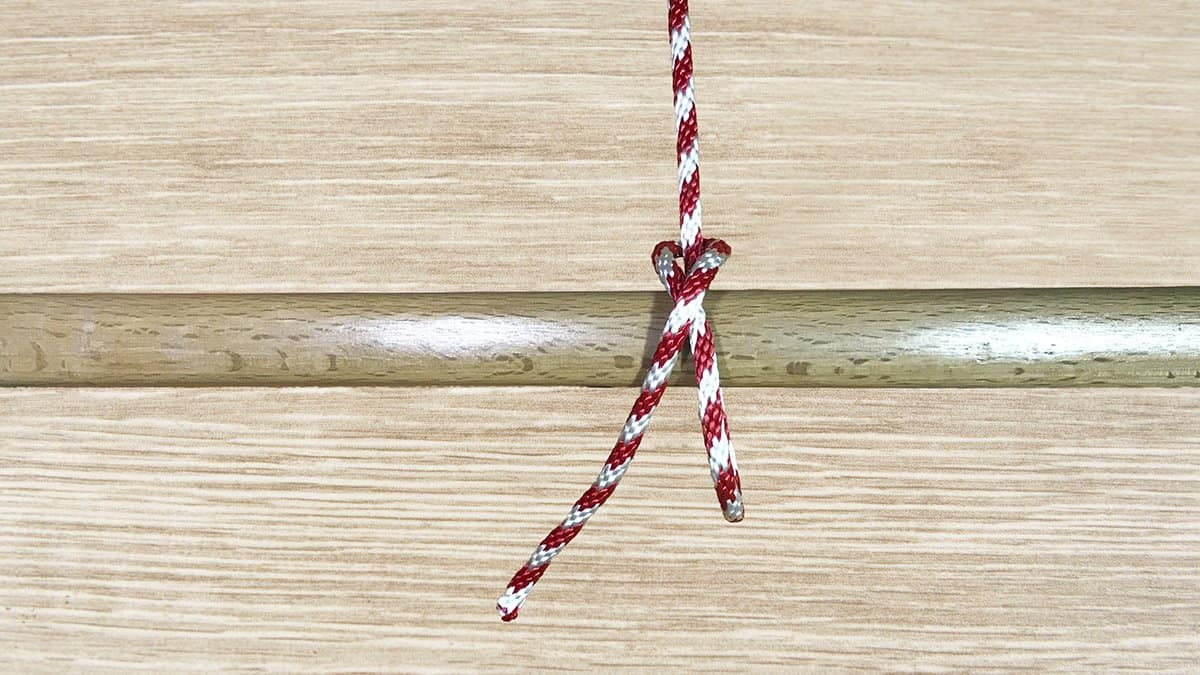
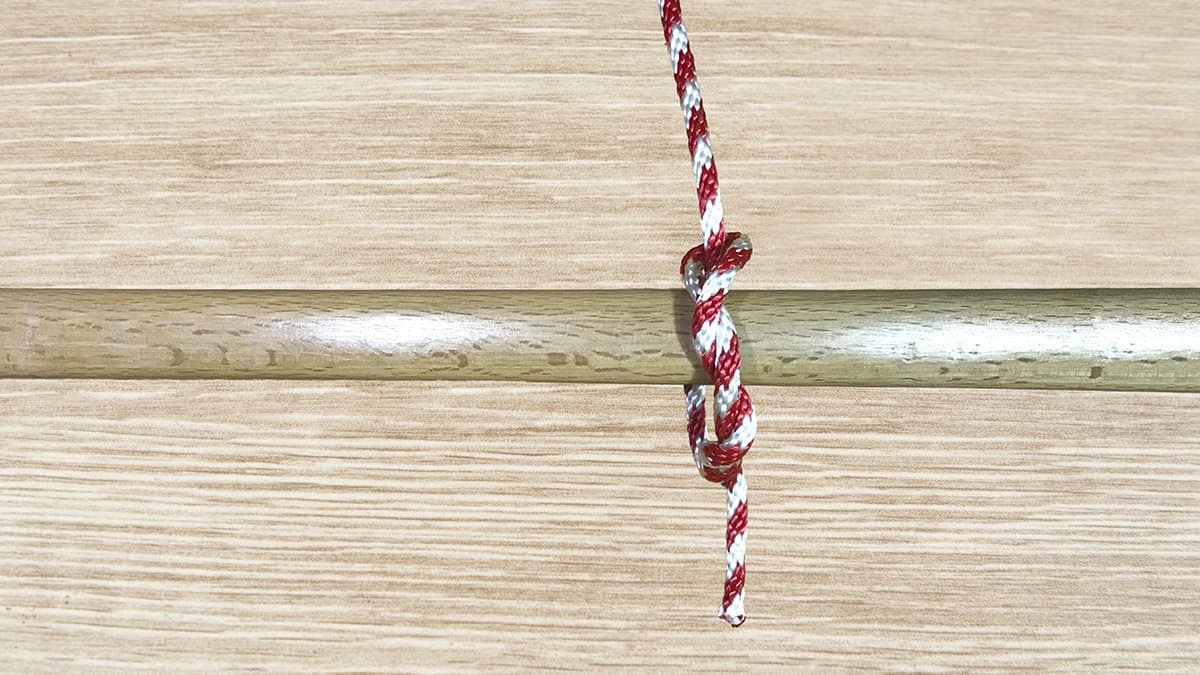
Step One: Wrap the rope around your piling or equivalent.
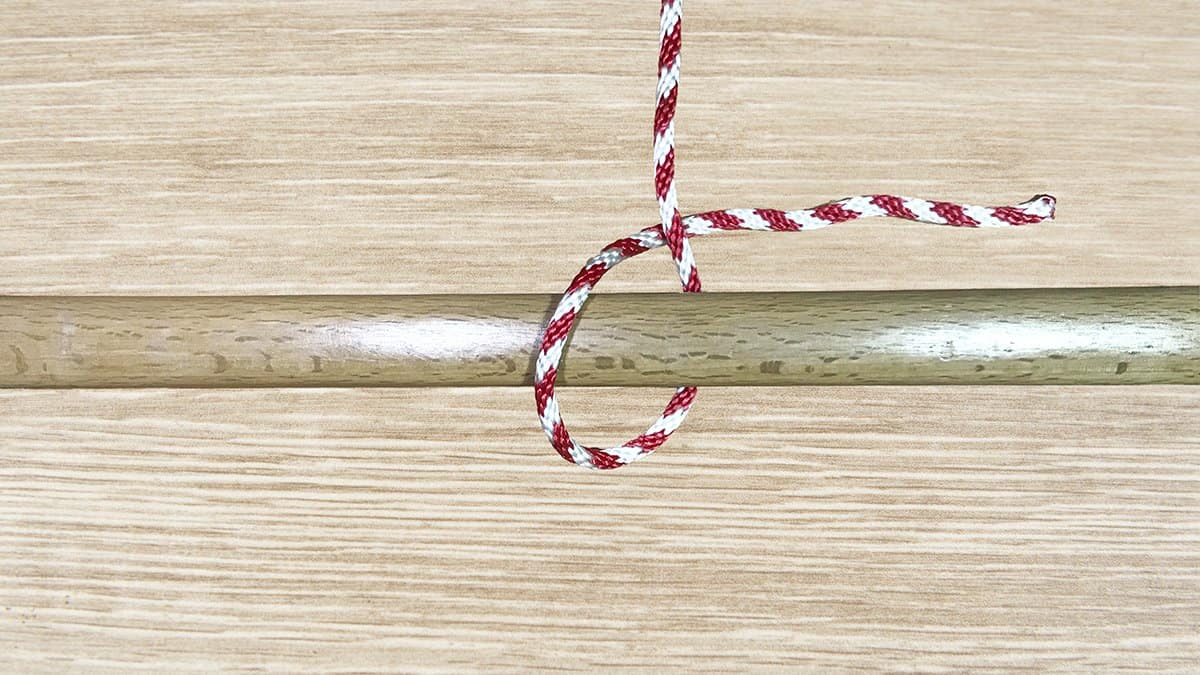
Step Two: Next, pass the working end around the standing end.
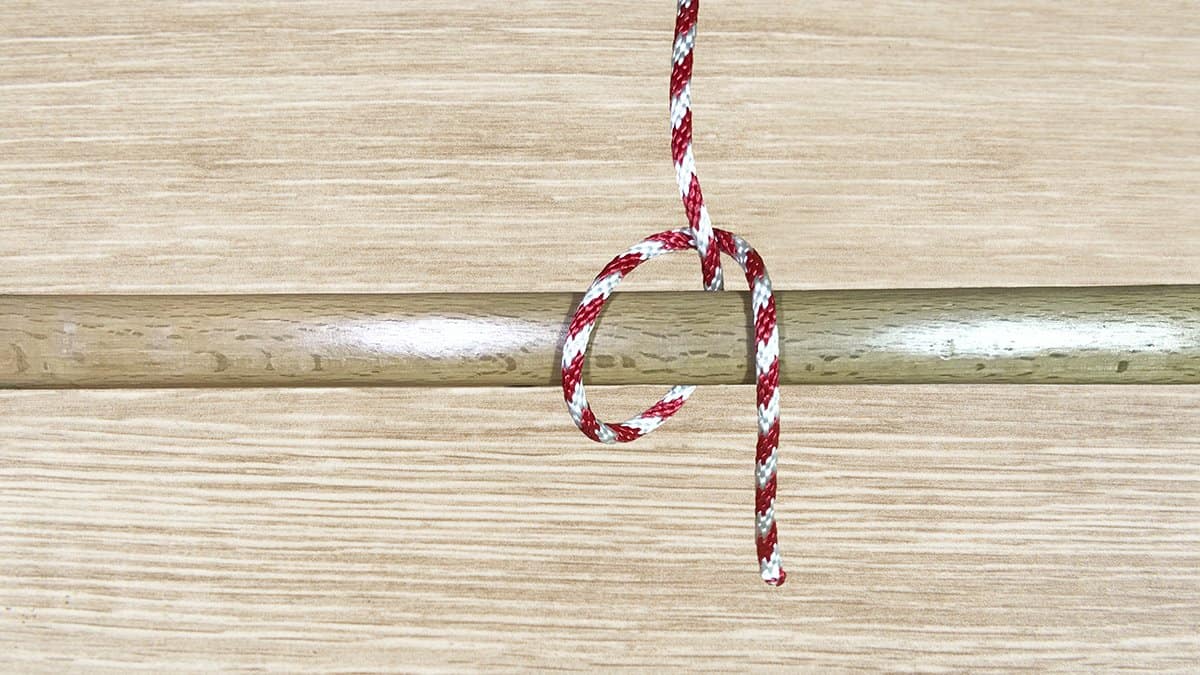
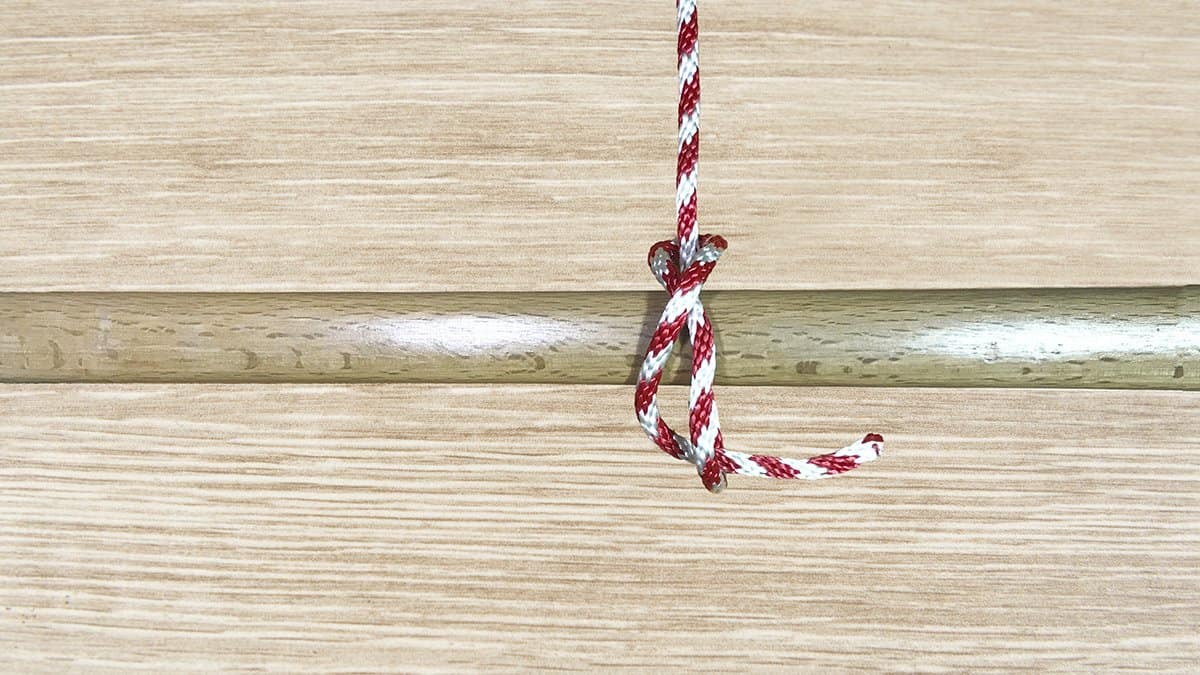
Step Three: Wrap the working end around the standing end three times.
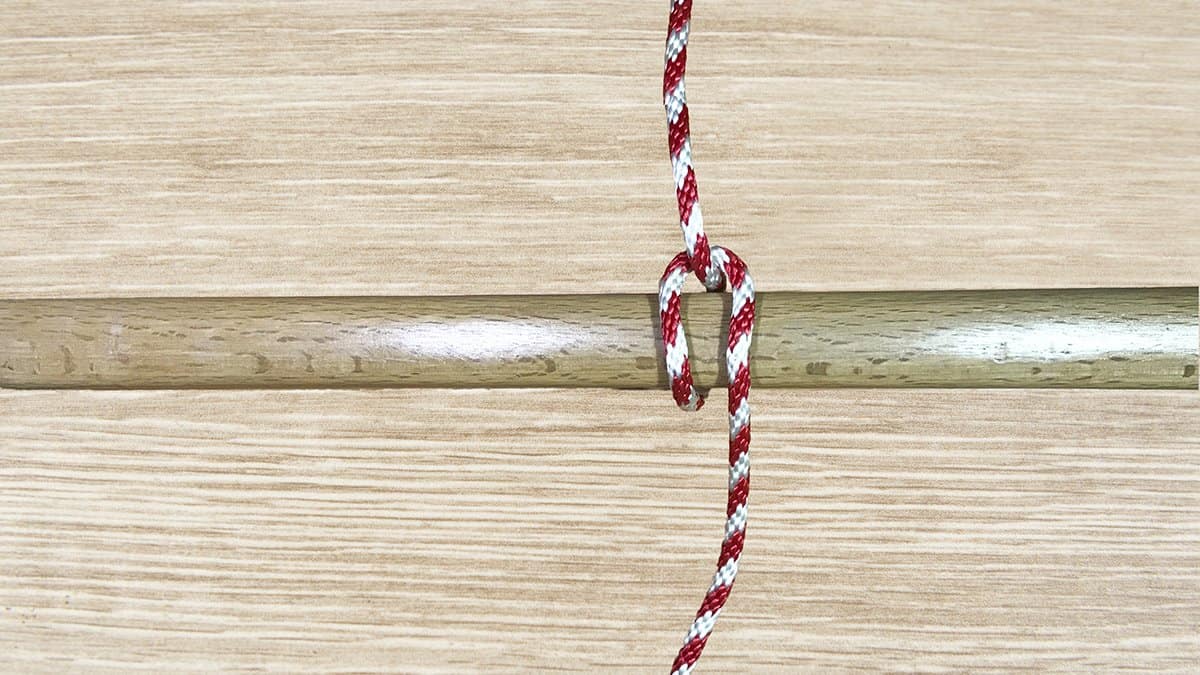
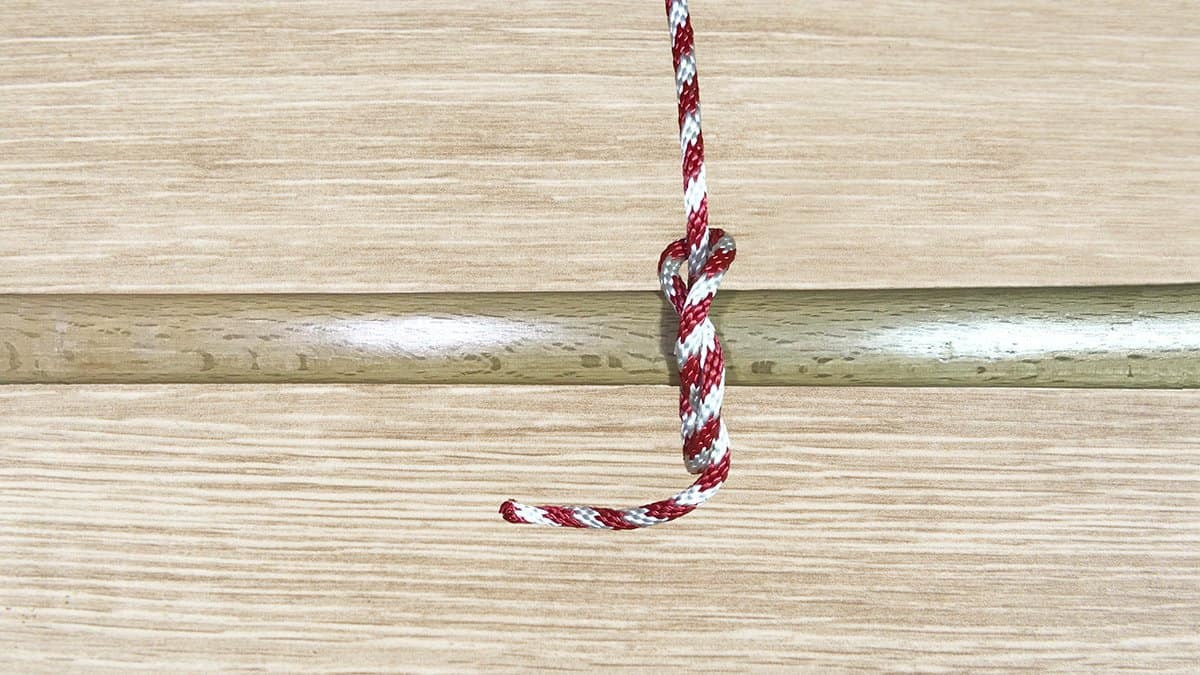
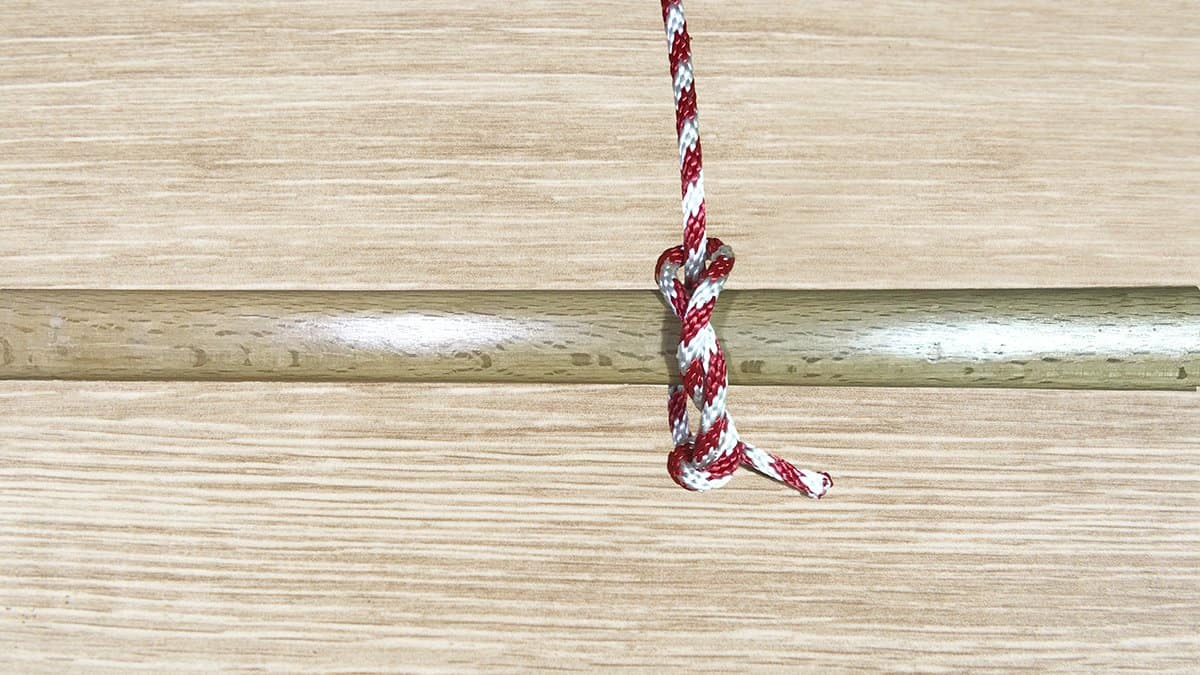
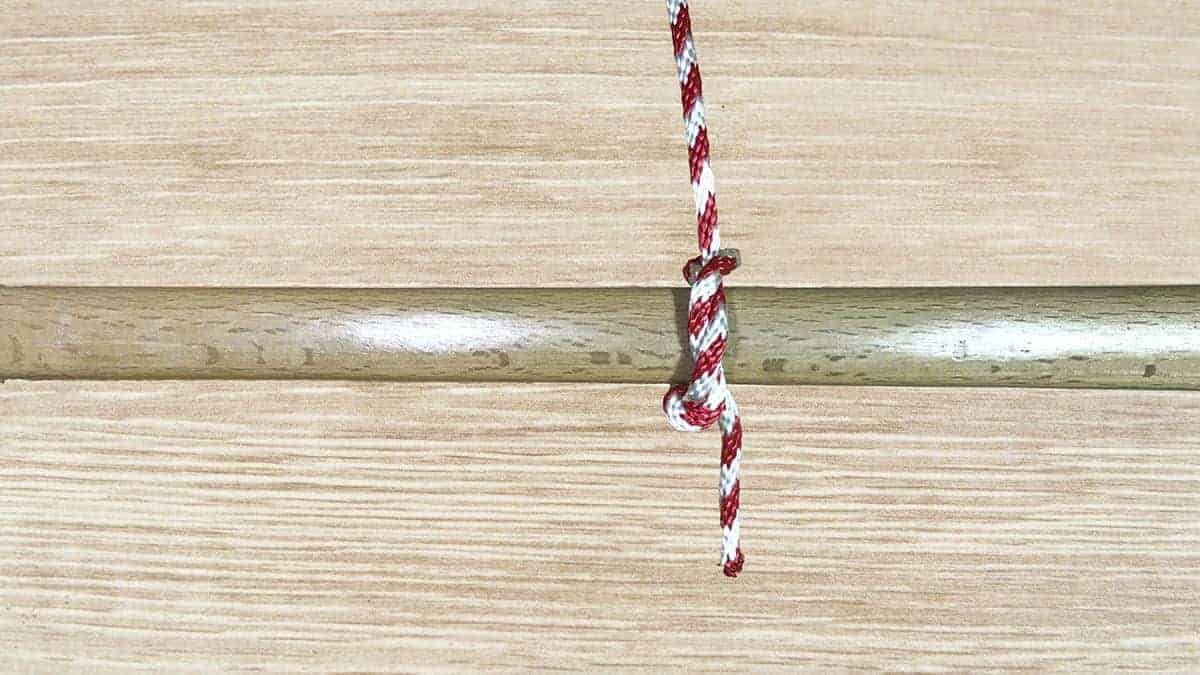
Step Four: Tighten the knot so that it grips the piling securely.
Step Five (Optional): Tie a couple of Half Hitch Knots towards the hauling end of the timber. This will make hoisting easier and prevent the timber from twisting.
Other Things To Consider
Now that you’ve mastered the Timber Hitch, there are a few things you should keep in mind. Here are some things you should know about the Timber Hitch: warnings, variants, and alternatives. Here’s everything you need to know about the Timber Hitch Knot!
Warnings
While the Timber Hitch is a fantastic knot, it does have one major shortcoming. This knot is only secure as long as it’s held under tension. The moment that you lose tension, the knot becomes unstable. It’s only a very minor shortcoming, and if you’re looking for something more secure, there are plenty of other knots available.
Variations
In Step Five of our guide, we explained that you can add additional Half Hitch Knots to improve stability. If you opt for this add-on, then you’re actually using a variation of the Timber Hitch rather than a classic Timber Hitch. This variation is known as the Killick Hitch.
Alternatives
Aside from the Killick Hitch variant, a good alternative to the classic Timber Hitch would be the Buntline Hitch. The Buntline Hitch is an incredibly strong and secure knot that won’t let you down. However, it might not be as well suited to your needs as the Timber Hitch.
Categories: Nautical Knots