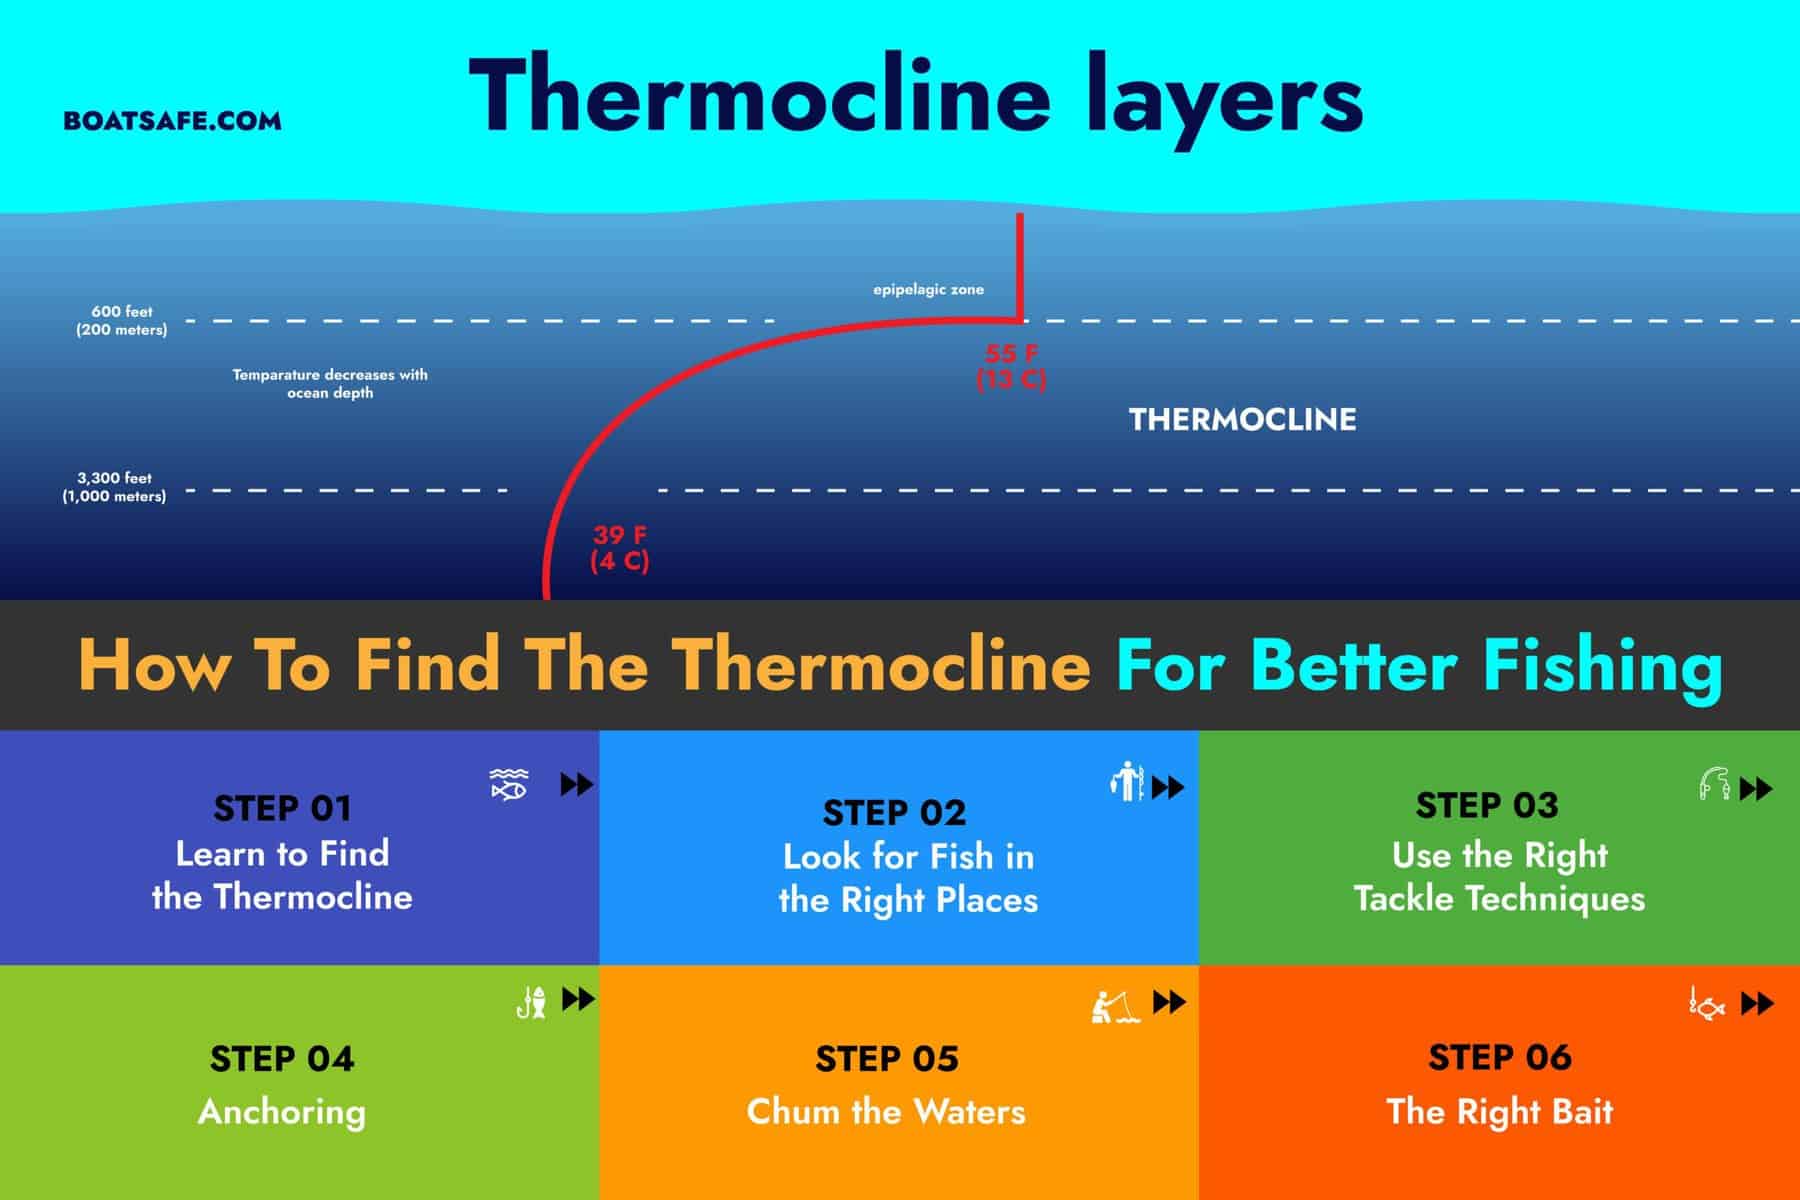
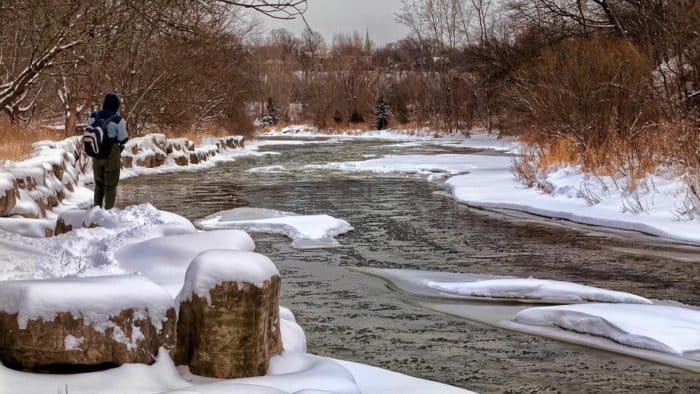
How To Find The Thermocline For Better FIshing
Published by Chris Riley in Fishing Last updated on February 7, 2021
What is Thermocline?
To understand the thermoclines, you need to understand the term fully: it’s a combination of two words, “thermal,” which means heat, and “cline,” which means a layer of degradation.
Thermocline is a transitional barrier or layer of water in which the water temperature changes rapidly and is very different from the warmer layer that is above it. The colder layer below it is called the thermocline. For a more thorough definition and understanding of it, check out our article on thermoclines.
How Do Anglers Find the Thermocline?
While it might seem that thermocline play a direct role in scuba diving, that is not the only water based activities that are affected by this phenomenon. Thermoclines also affect fishing (more on that in just a bit). It is, therefore, important for anglers to learn how to find and recognize thermocline. Here are some ways through which they can do that:
Using Boat Instruments
There are several good ways to locate the thermocline using your boat instruments:
- Find the baitfish: The first way is to simply look for the baitfish. In the middle of summer, these fish tend to congregate in the layer just above the thermocline because of the dissolved oxygen levels and much cooler waters than can be found just above them. Once you find the baitfish, you have pretty much found the thermocline. The best course of action would be for you to begin fishing those specific depths. Find channels, humps, banks, and drops that align with that depth; if you find the right underwater structure at that specific depth, you will find plenty of fish for your hook.
- Turn on the sensitivity: Another excellent way to find this layer is to turn on the sensitivity on your unit all the way up. After that, go out to the deeper sections of the water body you are on; you should see a band appearing on your screen. That band will be the thermocline layer in those waters.
Without Using Boat Instruments:
If you are not keen on using boat instruments, don’t worry, there are still ways to identify the thermocline. However, you are now venturing into more guessing than actual science. That being said, here are some ways to make a more educated guess as opposed to a blind one:
Look at the water clarity: Remember when we mentioned that the thermocline layer creates some kind of refraction and looks like oil in the water? You can actually try to see this if you look at the water clarity. The clearer the water, the deeper the thermocline layer is from where you are at that very moment.
Here is a video explaining thermoclines just a little bit more:
How Does Thermocline Affect Fishing?
Now, let’s take a look at why all this knowledge can be useful to an avid angler like you and me. The layer beneath the thermocline is essentially a “dead zone” as those waters won’t have any dissolved oxygen, and as such, fish can’t survive there.
This is important knowledge because some anglers like to go for bottom fishing, but if you throw a line into this zone, you are pretty much guaranteeing that you won’t catch any fish. That is why you need to learn how to find the thermocline in your local waters whenever you go fishing.
As we have already seen, the best place to find baitfish is the area just above the thermocline. This layer has enough dissolved oxygen, and the warmer waters are mixed with, the cooler waters to make it just right for fish to thrive. Here you will find plenty of baitfish, and where there is baitfish, there are other predatory species like Bass.
Tips and Tricks for Thermocline Fishing
Since the land beneath the thermocline is essential to the deadlands where little to no fish can be found, how can you use this knowledge to your advantage as an angler? Is there a way to fish the thermocline?
Yes, there are some tips you can use to make sure that you are a successful angler even though the thermocline exists:
Step 1: Learn to Find the Thermocline
We have already covered this extensively, including why finding the thermocline would be a good idea for anglers. As an avid angler, you need to get really good at finding the thermocline. In some cases, you can easily deduce that you are fishing beneath it when you spend hours without any bites. You can make your life much easier by marking the colder water layers on your fathometer.
Waters between 60 and 100 meters are hardly ever affected by the thermocline (depending on the season). Your fishing will be wonderful whenever this happens, as the bait and predatory fish will be frolicking even in the waters near the shore.
You just need to remember that the fish will tend to go where the water has a lot of oxygen, food and isn’t as freezing. There are species such as Cobia, Amberjack, Mangrove Snapper, and the African pompano that tend to hold their place in the water column just above the cold water.
Step 2: Look for Fish in the Right Places
Fish like underwater structures such as wrecks, rocks, and ledges. While you can usually find some fish hovering around smaller structures, you are advised to go for the larger alternatives when fishing the thermocline. Your time will be better spent if you head straight for the larger ledges, underwater wrecks and skip the smaller fishing holes altogether. You want to focus on finding fish high in the water column that can be found above the thermocline layer.
Step 3: Use the Right Tackle Techniques
This is where your skills as an angler will be brought into question. The fact that there will hardly be any fish at the bottom means that you don’t need to worry about bottom fishing at all here. The idea is to get your bait into that sweet spot where the fish will be, just beneath the surface enough to reach that area above the thermocline.
This means employing expert tackle techniques. Depending on the kind of current you are experiencing at that very moment, you can either use a light or no lead at all. You also need to use just the right amount of weight to slowly get your bait sinking to the right water column. Depending on the water clarity, you might want to use fluorocarbon or any other lighter lines.
That is only if the waters are very clear as they are most likely to be. In murkier waters, you might want to use a braided line. Although braided lines are strong, don’t break easily, and are excellent for avoiding snags, they do have one big disadvantage: they are very visible. That is why you should only use it in murky waters.
However, if you insist on using a braided line in clear waters, then you might want to ensure that you tie it to a monofilament or fluorocarbon leader to improve your chances of success. You can choose to use spin tackle or conventional depending on your preference and target fish.
Read: How to Tie Braided Fishing Line to Monofilament or Fluorocarbon
Step 4: Anchoring
Depending on the kind of fishing boat you are on, the idea is to position your vessel ahead as opposed to behind the structure. Let me explain: the fish are going to mark up the current. What this means is that if the fish mark South of the structure, then the current should be flowing to the North. You should then strive to anchor ahead instead of behind the structure relative to the current and the marked-up fish.
Step 5: Chum the Waters
This is another reason your boat’s positioning is crucial – you need to chum the waters, and for that chum to be effective, your vessel needs to be anchored in the right place relative to the current. You might only need a little chum in some cases, but there is a good chance that you may need quite a bit of it, so come prepared. Using the chum in the water, you will be attracting the fish to you and keeping them focused on your bait. In many cases, you will see the fish just underneath the surface at this point.
Step 6: The Right Bait
This will also depend on your personal preference, but I have found that Boston Mackerel or Sardines work just as well as bait as they do as chum. You can, however, use professional chum, which works just as well. While live bait isn’t always necessary, it’s often best to have some with you just if you find that the fish are on the finicky side on that particular day.
With this kind of skittish fish, live bait helps to increase the chances of getting bites. You need to remember that there is a good chance you will find a lot of baitfish just above the thermocline.
This means that the predators in that particular fishing region are spoilt for choice and can afford to be picky. That is why bringing live bait is always a good idea. However, if you find that the area is devoid of baitfish, you can conclude that the predatory fish will be hungry and less picky.
The general rule of thumb is that the more severe the thermocline, the more likely the fish will be hungry. Although, it might take a while to get them fired up and biting. The use of chum will also increase your chances of catching pelagic species such as Black Fin Tuna, King Mackerel, and Mahi Mahi.
As you can see, with the right knowledge and finessed fishing skills, the thermocline can be your friend. Learning how to find one and how to fish it is a skill that every angler should look to master. It could very well be the best way to improve your strike and catch rate. Now you have the knowledge you need to identify and take advantage of the thermocline in your local waters for better fishing.
Categories: Fishing


1 Comment
Tim Merritt on August 7, 2021
Does thermocline also exist in trout streams & rivers?