How to Install a Fish Finder
Published by Ian Fortey in Boats Last updated on December 29, 2023
So you’ve got the best new fish finder. You got your battery picked out; you know how to use it, you’re ready to go. Now how do you install the thing on your boat? Unfortunately, installing a fish finder isn’t as easy as just setting it on the deck. There are few steps that we can walk you through to ensure your setup is smooth and your fish finder works well.
Set Up Your Fish Finder First
Before you start your fish finder installation, you can set the software up. You can do this from home without even worrying about your boat. You just need to turn it on and register the device on the company’s website. After that you can update any fish finder software. It’s kind of like buying a new computer. Between the time it was packaged in the time you bought it, the company probably has made some updates. So once it’s up to date then your goods to take it to your boat.
Tools to Install a Fish Finder
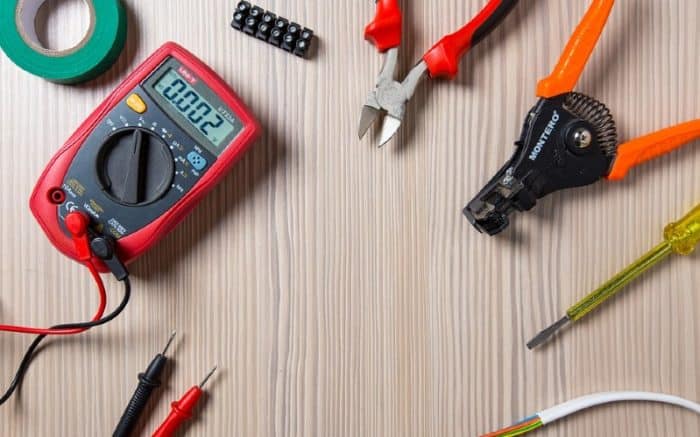
Before you get started with any job, it’s always good to have the right tools handy.
- A power drill
- Phillips head screwdriver
- Wire strippers
- Fish tape
- Cable ties
- Adhesive sealant
- Silicone sealant
- Terminal connectors
- Crimp connectors
- Clamshell fitting
- Heat shrink tubing
Setting Up Your Fish Finder Mount

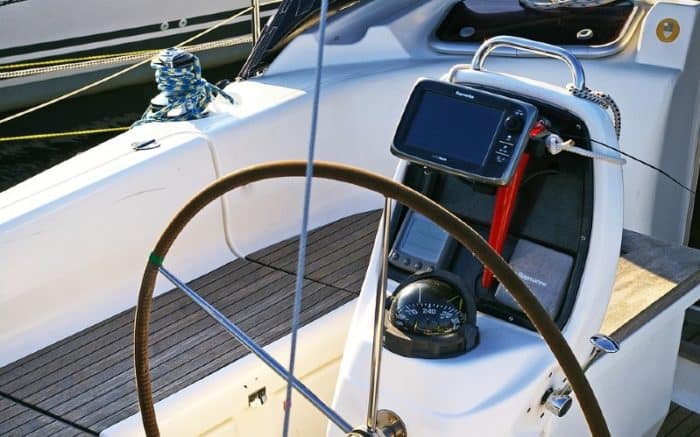
You need to pick the right place on your boat to actually install a fish finder. It needs to be conveniently located where you can see it and make use of it. Consider the angle of the screen as well. Things to consider include:
- Will the sun cause glare?
- Is it too low or too high either?
- Can you see it over the steering wheel?
- Can you access the micro SD slots?
- Is it close enough to the power source?
The best mounting location is often near the center of the helm. Make sure the place you choose has rooms for both bolts and wires. If they’re in the way of other parts, make some adjustments. You need a pilot hole and an exit hole to be easy to access.
Overhead mounts are a bad idea in our opinion. Looking up again and again can get tiresome. Also, the odds of someone hitting their head is always present.
Be Aware of Wiring
When selecting where you’re going to mount your fish finder, remember that it’s going to need a power source. How are the power cables going to get from the battery to the fish finder? You can use those cable ties to keep your wires together. But you still don’t want to have a lot of wiring hanging out if you can avoid it.
Since you’re going to be drilling holes to run wires through, this needs to be pretty precise. You need to know how much slack you’re going to have. If there’s too much slack, the wires can get tangled and become a safety hazard. If there’s not enough slack then it’s going to be difficult to connect the fish finder to the battery. You run the risk of the wire pulling free and leaving you without power.
You need to decide ahead of time where you’re going to put the fish finder and the battery. Before securing anything, make sure the setup looks good and you have enough space. Check how the unit’s wires will travel from the fish finder itself through the wiring hole. You need proper clearance without bending the wires too badly. A sharp bend in wires will be awkward to deal with. They may also rub against the hole you’ve drilled. Over time, this can strip the wires.
Drill Your Mounting Holes
Check and double check your position before drilling anything. If you’re 100% confident, bust out that drill. Fiberglass hulls have a habit of splintering. You need to really hit hard with the drill at full power. Don’t hesitate when drilling through the hull or wherever it’s being mounted. Slow drills can splinter the gel coat.
Make the holes for the wires to enter and exit. Place it behind the binnacle mount. Measure your wire bundle to get a rough idea of hole size. You want to drill a hole big enough to accommodate it but not too big. If it’s too large, sealing it later will become difficult.
Drill the appropriate holes to mount the fish finder as well.
Use Your Sealant
Run sealant around all the holes you’re made. You can add some to the bolts as well. This will make the installation snug and more reliable. And, of course, prevent any moisture buildup.
Sealant around the hole where the wires will be running will add a textured layer. This will help hold the wires in place while you get everything installed. You don’t need a ton, just a little around the edge. It will prevent that chafing we mentioned earlier as well.
Install the Binnacle Mount
Now you can install the binnacle itself. Make sure you have some sealant on the bolts. Seal them in place and tighten the locking nuts. You should have a firm and secure installation at this point. No wobble or excess space.
Running the Power Leads
Run your wires through the holes and check the length. If everything was measured correctly, things should be fine. But you may need to adjust lengths here. If you find that the wires are too long make sure you’re not cutting the inline fuse.
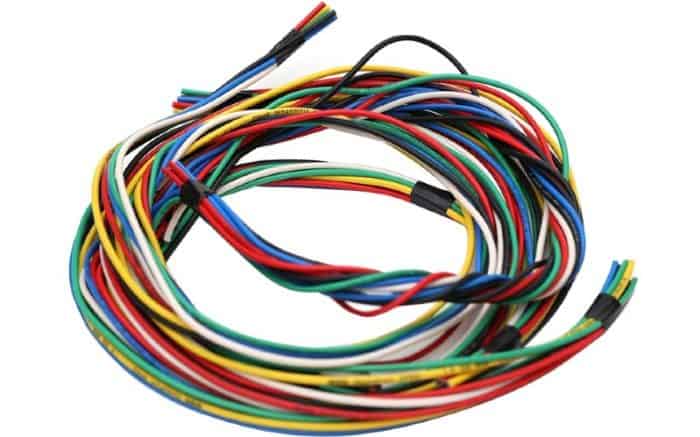
If you don’t have enough wire, you can add length. Use crimped barrel connectors to link the same color and type of wire. Make sure you’re using the wire recommended by the fish finder’s manufacturer. You don’t want to link two different kinds of wires here. The manufacturer’s instructions are your best bet.
Once you’ve connected the wires, use the heat shrink tubing and a heat gun to finish the connection. At this point you should be able to run the wires through the hole you drilled. Connect to your fuse block and secure the wires. Cable ties every 18 inches is standard for keeping things secure. Make sure it’s not too loose anywhere with hanging slack.
Installing Your Transducer
Now that the fish finder is where it needs to be, the transducer is next. This needs to be installed with transom mounts. Like the fish finder itself, picking the right spot is important. You want a deep spot on the hull for best performance. No through-hull fittings or other things in your way. You want an unobstructed area to reduce any chop and turbulence. The rougher the water around the transducer gets, the worse it will perform. The fish finder only works thanks to the transducer.
The transducer should be horizontal and just below the running surface of the hull. Just under, only ⅛ of an inch. Hold the transducer bracket in place. Now you can determine if you can install it properly where you’ve chosen. Mark the location so you know where to drill the holes.
Running the Transducer Wires
Run your transducer wires before installing the bracket. If this is the first fish finder your boat has ever had, it will take some effort. If you had an old fish finder, you can probably use the old wire.
If the job is new, then you need to use some fish tape or a wire fish to pull the wires through the wiring chase. Pull all the wire to the helm and secure any extra inside with tie wraps or clamps.
Do Not Cut the Transducer Wire!
You may have the urge to cut what looks like excess transducer cable. This is a bad idea. When you cut excess wire and then reconnect the pieces, you make interference. Resistance because of those electrical connections will decrease your fish finder’s performance. That will ruin image quality as the unit loses clarity.
Do Not Bundle the Transducer Wire!
If you wrap the transducer wires with your VHF wires or trolling motor wires, you create interference. This will also greatly reduce the unit’s performance. Keep those wires apart! Transducer and power cables should be on their own. Avoid the engine’s wiring harness.
Mount the Transducer
Now that the wires are ready, you can mount your transducer. Drill through the holes you marked in the transom. Use adhesive sealant here to coat the mounting screws. Apply more to the holes and the bracket itself. You want this thing 100% watertight so use it liberally. Now you can secure the bracket.
Seal Up Holes
Seal the wiring holes you’ve made in the helm. Silicon sealant should do this job well. Put a clamshell vent over the top when you’re done. You can hold this in place, drill pilot holes where they need to go and screw it in place. Double check any of the other holes you’ve made. This is especially true for the transom mount where the transducer is. You don’t need water coming in. If you’re unsure, add some more sealant just to be safe.
That waterproof sealant will not dry instantly. Keep that in mind here. You need to wait until it’s ready to go before you take your boat out.
Connect the Wires
With everything sealed and mounted, it’s time to make connections. Make sure your battery is off first. Most anglers have a fish finder specific battery. If you’re using your regular boat battery, make sure you’re using the best boat battery you can find. Plug in the power leads and transducer wires. Turn the battery back on and make sure the fish finder has power. If the fish finder doesn’t turn on but your other electronics work, then you have a problem. Turn the battery off again and go back over the wiring. Look for any loose connections. If you had to cut and reconnect any wires, make sure those connections are secure. Reconnect everything and try again.
If you have power to everything, then you’re almost done. Once that sealant is dry you’re good to go. This is the part that most boaters find frustrating. You can’t rush a waterproof seal. To be perfectly safe, you want to wait at least a week before putting it in the water again. Yes, it’s a long time. But it’s better than your boat springing a leak through a seal that didn’t dry.
Test Running
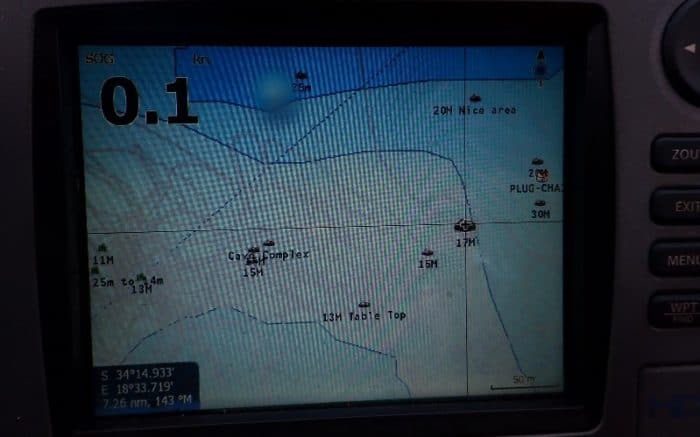
If everything is dry, and the power works, you need to run a test. Just because you have the fish finder installed doesn’t necessarily mean it works. There’s always a chance the transducer is in a bad place.
If your transducer was installed too high, then you will have no reading. Turn the fish finder on and head out on the water to see. Slow and steady is what you want here. The faster you go, the worse the images will be. Check the transducer location as you’re moving. If it’s entirely above the water surface, then you need to install it a little lower. This will also fix it if you find that the reading seems to cut in and out. Just dropping it slightly lower should clear up these problems.
Minor adjustments work best with a transducer that is not working well. Raise or lower just a hair each time, then check the results. Ideally your bracket was designed to allow for a range of adjustments.
If you feel like it’s in a good place, pick up speed a little. If the transducer sends good signals at full speed you’re golden.
Mounting a Kayak Fish Finder

This guide can easily be adapted to even a small boat like a kayak. Even the best kayak fish finders follow all the same principles just in a smaller space. You’ll be mounting the display probably right in front of you or to the side of the foot well.
Be careful with the fish finder mount for a kayak. Some are designed for kayaks but some are not. If the foot of the mount is too big, you simply won’t have the hull space for it. So keep that in mind when selecting a kayak fish finder.
Some companies will make aftermarket mounts specifically for kayaks. These can be a lifesaver when it comes to space saving mount design. You can find center console mounts as well as slide track mounts. These slide track mounts are great for fishing kayaks, At the end of a fishing trip you can simply pop them off and go,
Mounting a Transducer on a Kayak
There are several ways kayaks are designed that can affect how to mount a transducer. Some kayaks are designed in a way that was meant to have a transducer installed. Obviously this makes things easier. You can mount a transducer to scupper hole with the right kind of mount.
In-hull kayak transducers are another option. Because a kayak is thin plastic or other composite, the sonar waves can travel through the material. This does cause interference, but with many models it’s minimal. You can’t use it with a side-scan transducer, of course. But for traditional sonar, it’s a decent option that doesn’t require a lot of work.
An in-hull transducer just needs to be secured in place. A flexible adhesive sealant should do the job and not allow the unit to come loose. Put the transducer in a transducer well to keep it protected. Something simple like a piece of styrofoam or high-density foam can suffice. Just measure the unit and cut to fit. You want it about 3 inches longer than your transducer with the shape of the transducer cut out of the middle..
Once you have the well cut, glue it in place along the center line. Fill the will with adhesive and pop the transducer in place. Make sure there are no air bubbles because those will affect sonar readings.
Arm mounted transducers attach at a right angle over the side of a kayak. These work off the deck or a slide track mount. These are pretty common and easy to attach and use. The potential downside is some increased drag when in use. Usually it’s not a huge issues. Still, it depends on the type of kayak you’re using.
From there, you just need a kayak fish finder battery to connect it to. These lithium batteries are smaller than SLA batteries and won’t take up a ton of room even in a kayak.
The Bottom Line
As far as marine electronics go, installing a fish finder is a job that takes some time and patience. But isn’t too hard. Once you have your location picked out, the rest is pretty easy. Just pay attention to how those wires are running. If your boat had a fish finder installed once already, re-use the old holes. That will make the job much easier. It will also keep your boat more secure. The fewer holes you need to drill the better, right?
If you don’t want put in the effort to install it then you might consider a portable fish finder.