How To Tie An Eye Splice Knot
Published by Joe Appleton in Nautical Knots Last updated on July 12, 2022
Learning how to tie an Eye Splice Knot it a very practical skill. If you’re not familiar with an Eye Splice, it’s a way of creating a permanent loop on the end of a rope. It can only be done on ropes with multiple-strands as part of its construction. When properly tied, it creates a very strong and reliable loop that can be used for hundreds of practical applications.
The Eye Splice Knot and a number of its variants are described in the Ashley Book Of Knots, listed under #2725. There are a number of variations and tying methods, but we’ll get to those later. For now, let’s take a look at what the Eye Splice is often used for.
Uses
Having a reliable and secure loop at the end of a rope is incredibly useful. The Eye Splice can be made with a loop of any size, and you can build it to your own specifications. For the most part, boaters and sailors use the Eye Splice Knot for making sturdy loops that can be used on the end of mooring lines. Climbers and mountaineers use this knot for securing their ropes and creating secure mounting points.
The average knot enthusiast can use this knot for everyday applications, such as securing their hammock to a hook, making a garden swing, or for a light-duty tow rope. The possibilities truly are endless. If you want to learn how to tie an Eye Splice Knot, you’ve come to the right place. Here’s all you need to know.
How To Tie An Eye Splice Knot
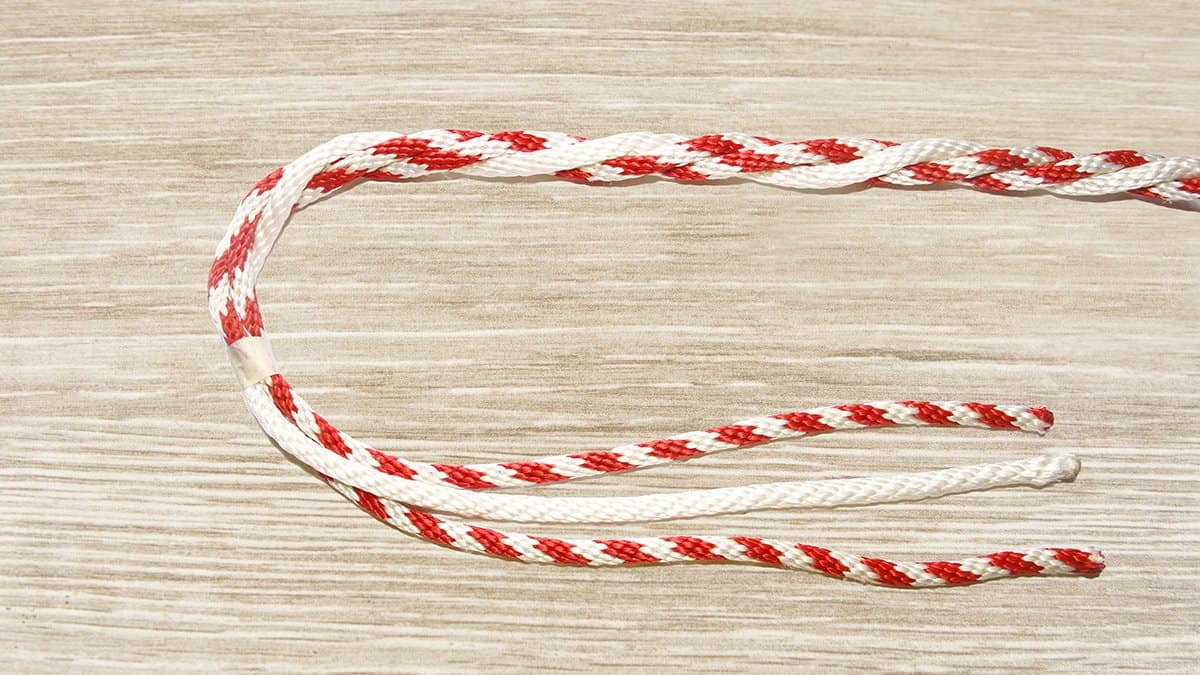
Before we launch into the tying guide, there are a few things you need to know before you can get started. Firstly, these splices can be made using different ropes. We recommend learning with a three-strand rope. You’ll need to unravel these strands far enough that you can effectively use them and make a loop.
The general rule is to unravel three times the diameter of the rope per tuck. For example, if you’re using a rope with a half-inch diameter, and plan to make five tucks, the result would be a length of 7.5 inches that you’d need to unravel. (3 X 1/2”) X 5 = 7.5”
If you’re confused about what a tuck is, this another name for a plaid. For the example above, you’d want to make 5 complete plaids into the rope with the unraveled ends. Confused? It sounds trickier than it is. Grab your 3-strand rope and try and tie one. It’ll make it all much easier to understand.
Lastly, it’s a good idea to secure the part of the rope where your unraveled strands are stemming from. You can do this by using a bit of tape wrapped around the whole rope. It’s also a handy idea to secure the ends of the strands with colored tape if you have it, this can stop you from getting confused when you’re first learning how to tie this splice.
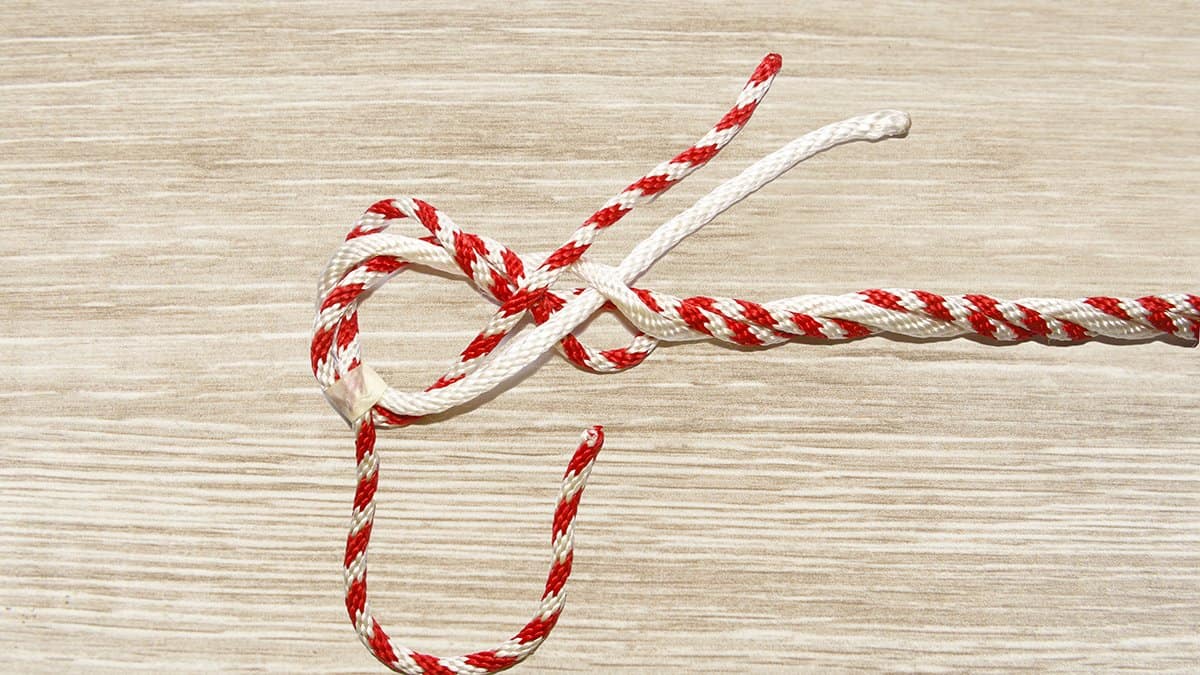
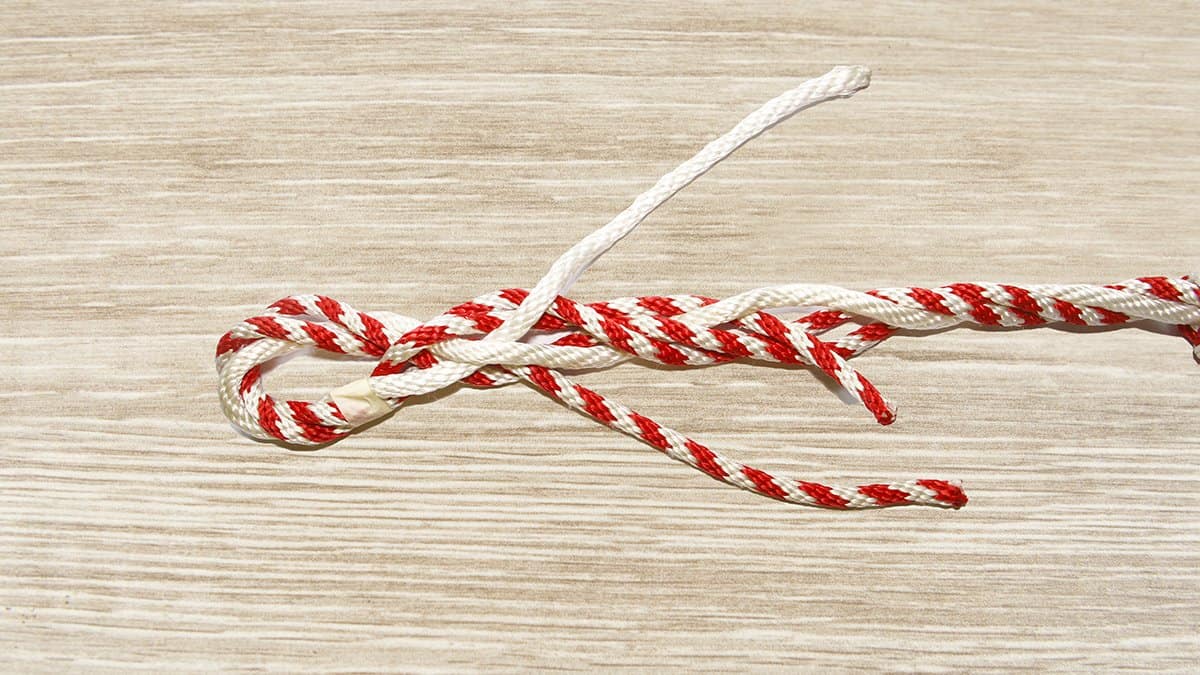
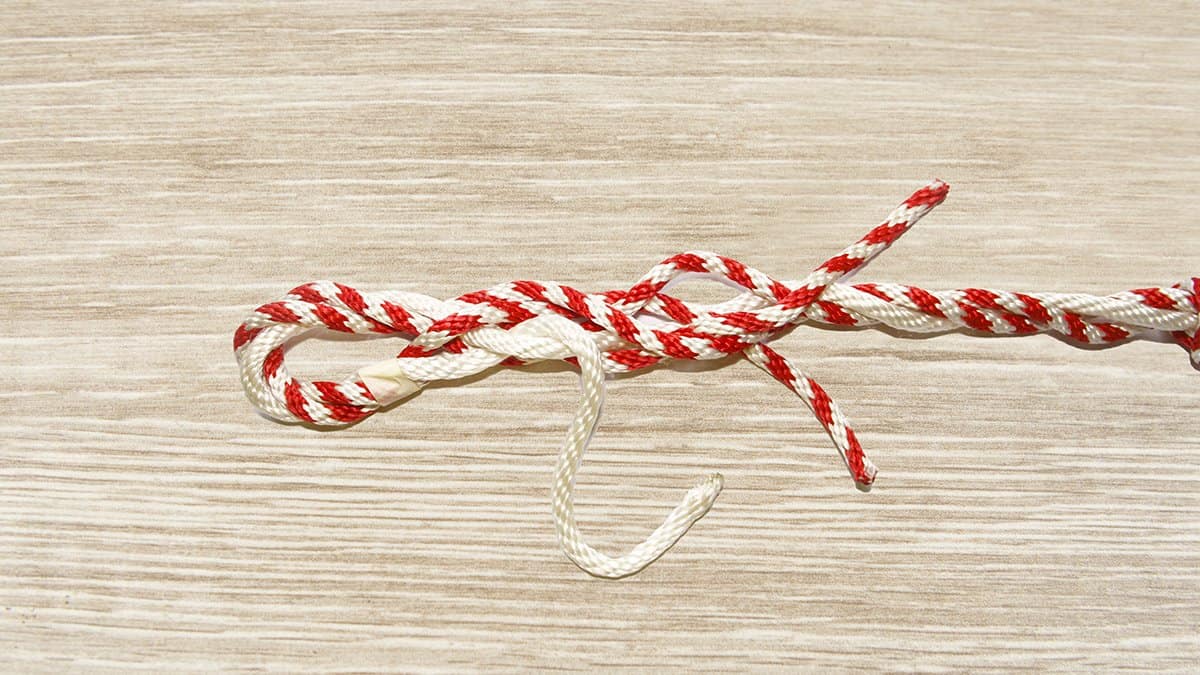
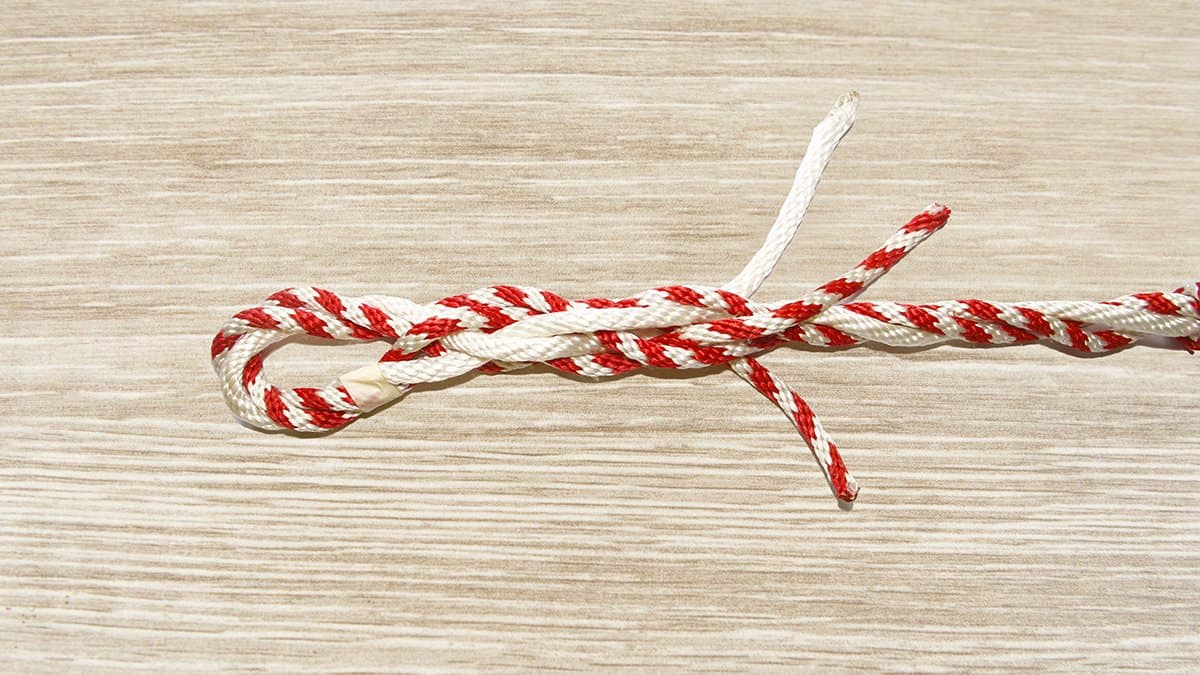
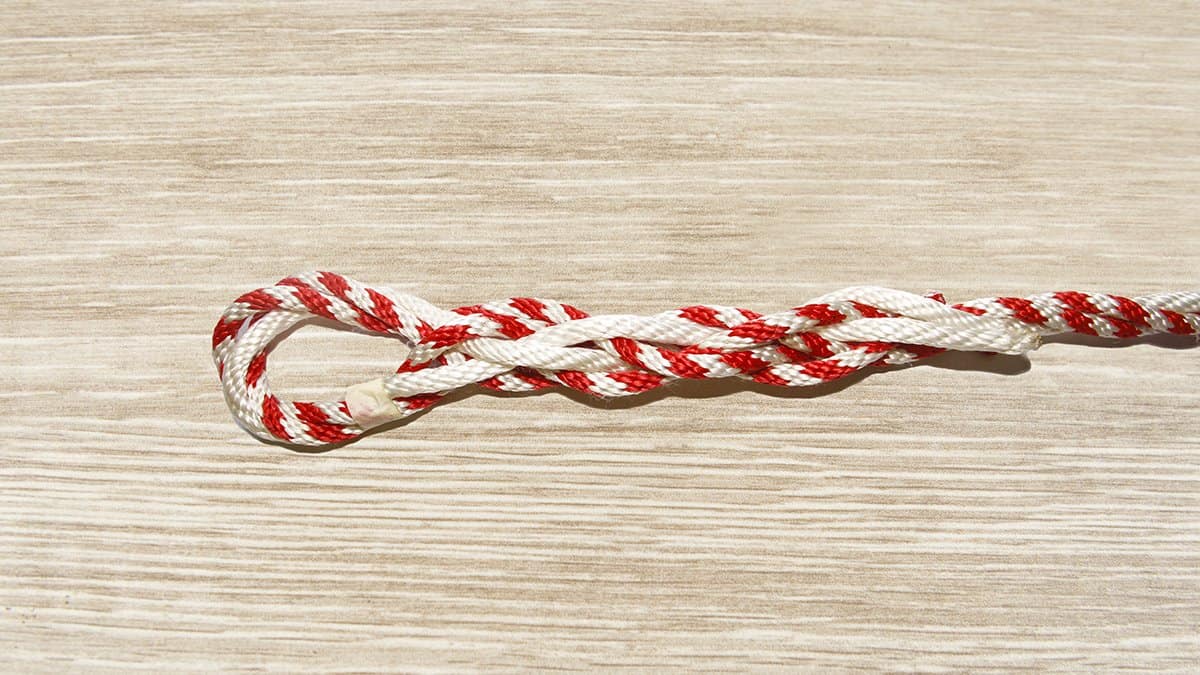
Step One: Tape your ends, and arrange your strands so that they’re easy to identify.
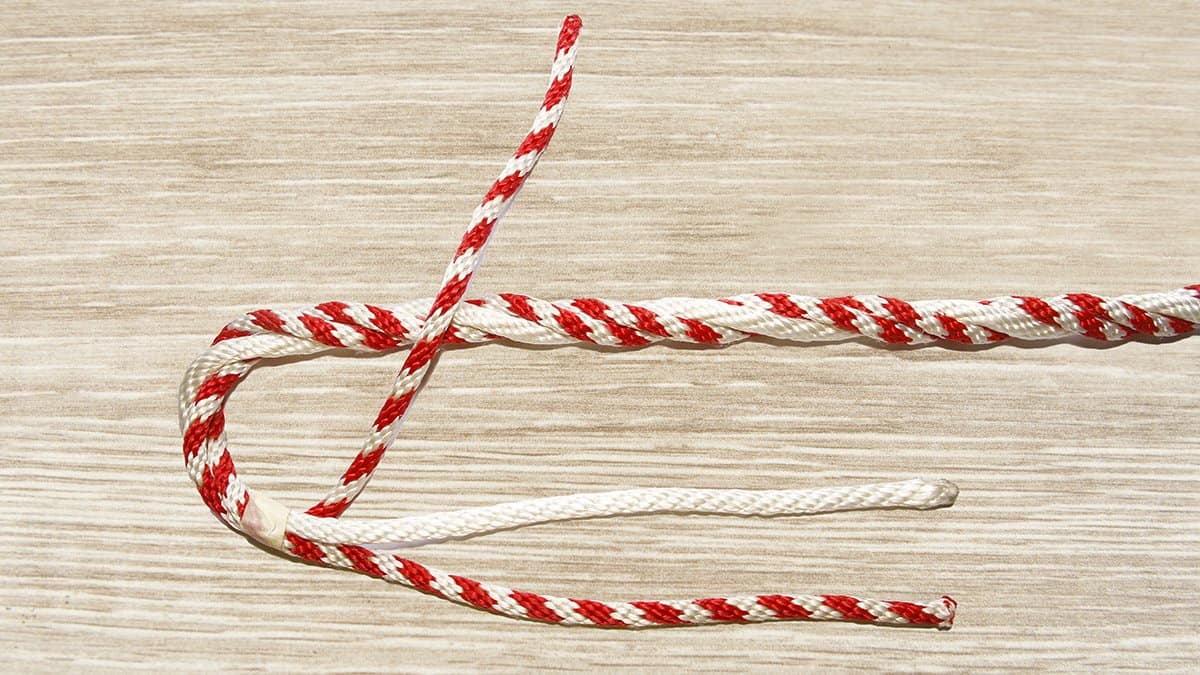
Step Two: Pass the center strand under a standing strand.
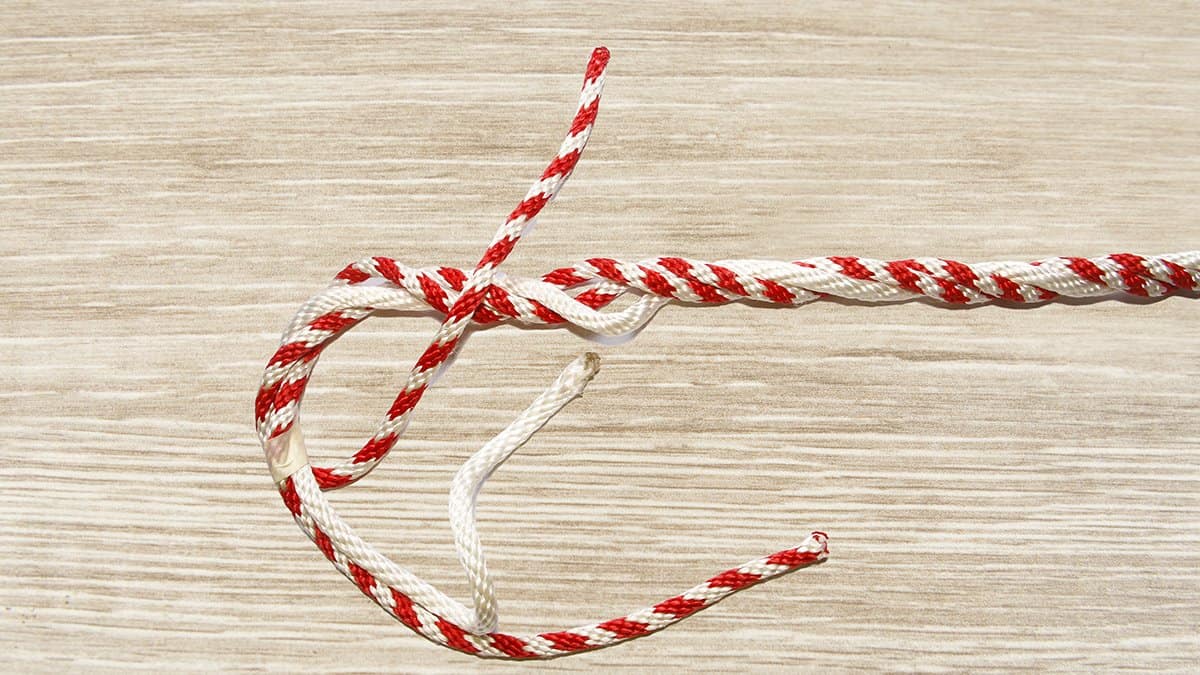
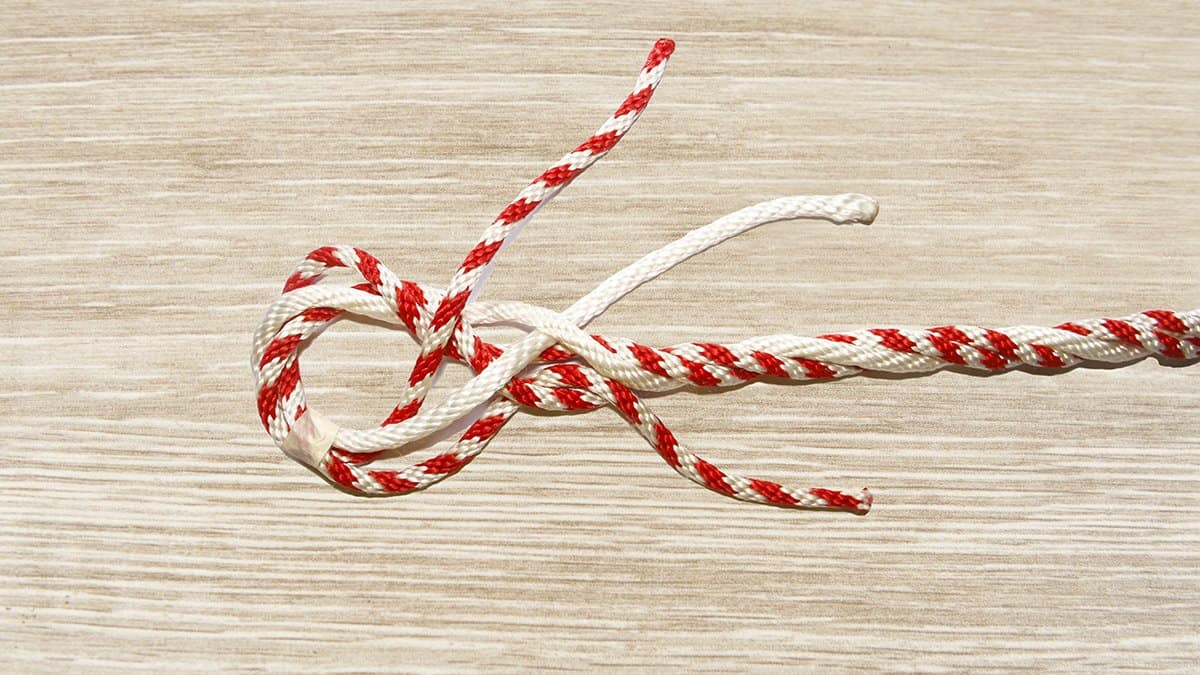
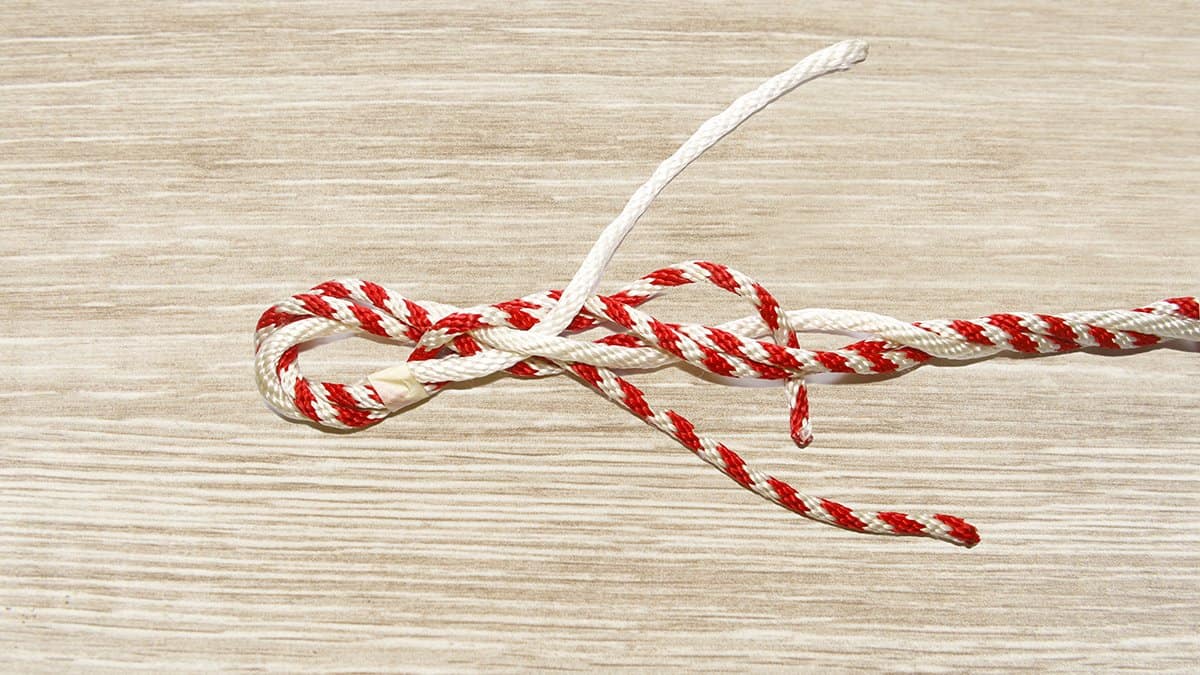
Step Three: Pass the lower strand under the corresponding lower strand.
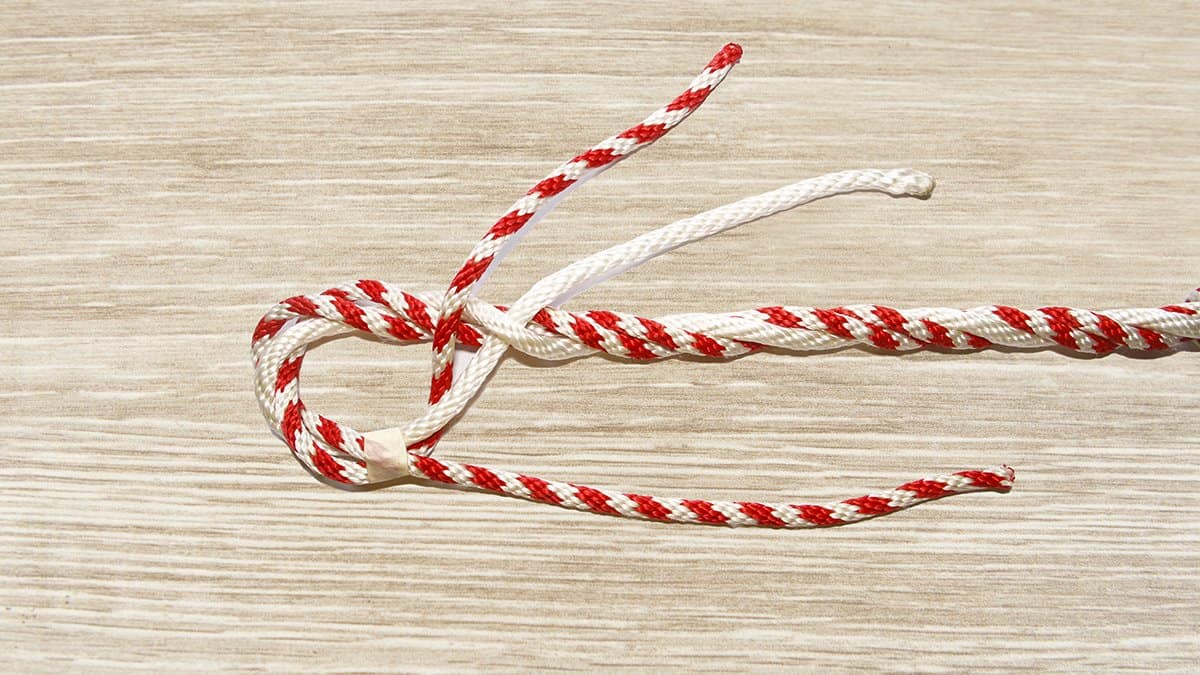
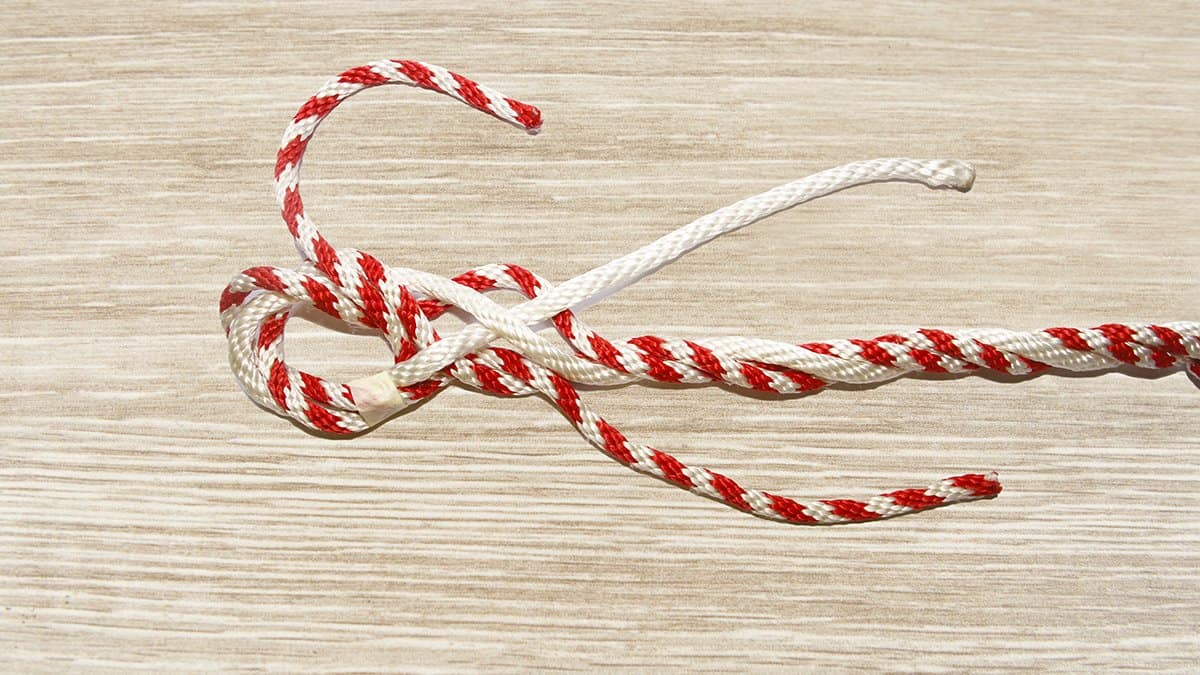
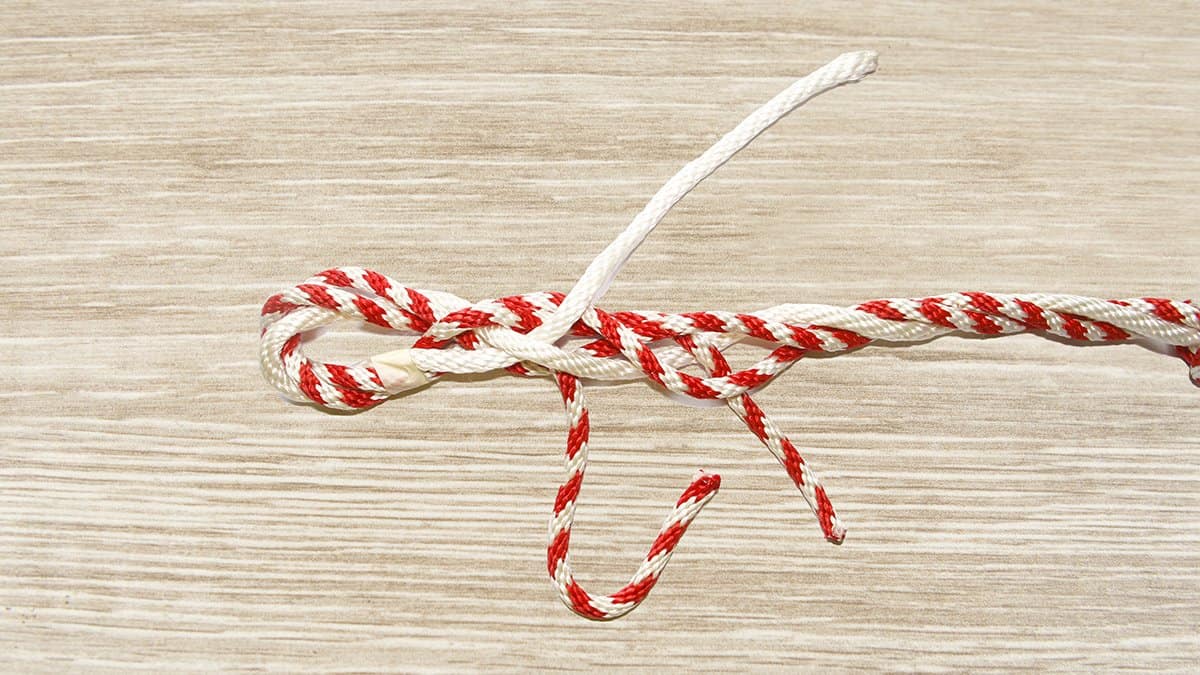
Step Four: Pass the upper strand under an upper standing strand.
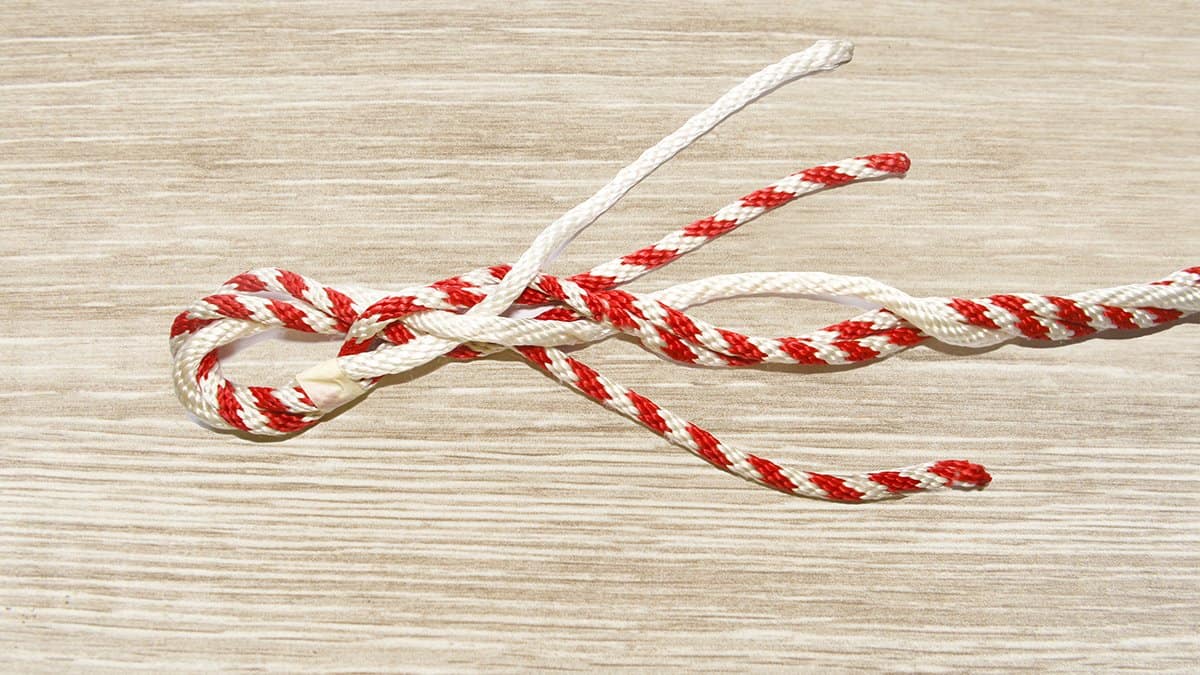
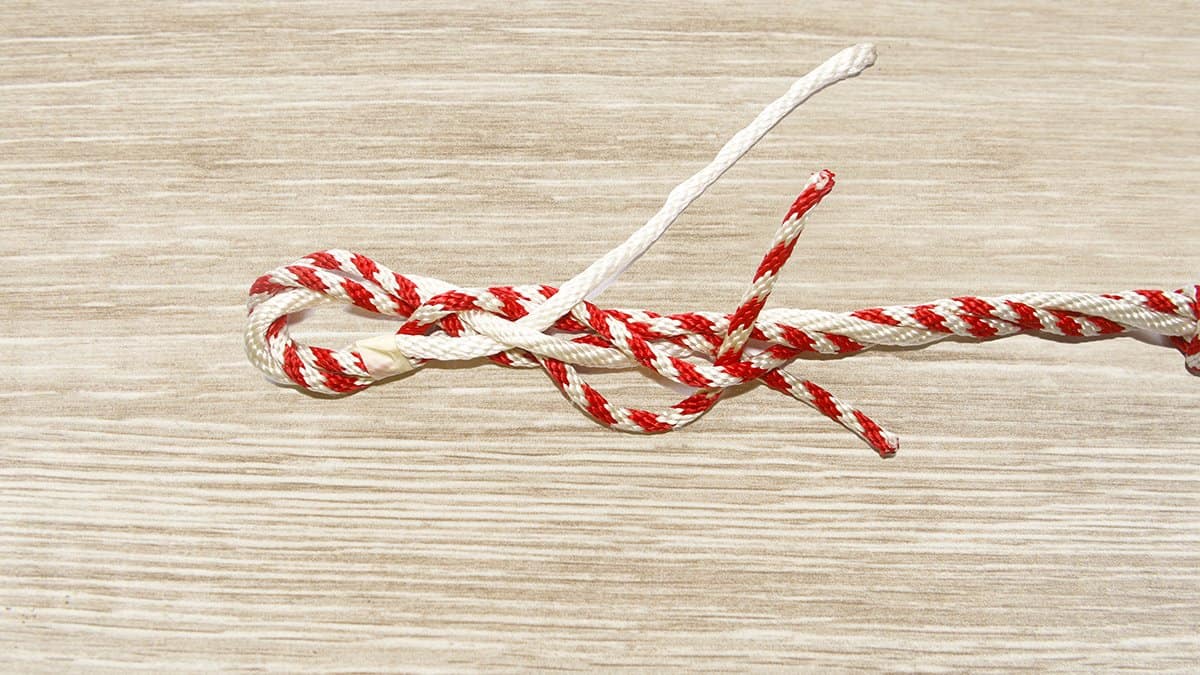
Step Five: Repeat this process for the remaining amount of tucks.
Note: this is a very complicated knot to explain. For the best results, we recommend that you follow the images very closely. Once you’ve got it, it will make perfect sense!
Other Things To Consider
Now that you know how to tie an Eye Splice, there are a few things to keep in mind. Not all ropes are good for splicing; some ropes require different splicing techniques; some rope types may even require special tools to splice; and sometimes, a knot with a loop may be better than a splice! Here’s some extra advice about the Eye Splice Knot and some of its quirks.
Warnings
Tight ropes, or ropes with a large diameter, can be very difficult to feed strands through. Sometimes it is physically impossible. However, there are a number of ways you can overcome this.
You can use tape on the end of each strand, and wrap it into a makeshift spike. Some tapes work better than others, but it should still be possible to form a little spike at the end to help you penetrate the more difficult ropes.
You can also use something spikey to try and prize open a tight section of the standing end. Using something sharp to make an opening can give good results. You don’t have to use a fancy implement either: a set of needle-nosed pliers might do the trick, or a pen, pencil, or knitting needle. If you have a marlinespike, now is a good time to use it.
The best tool for the job would be a little tool called a fid. A fid is a short and hollow metal gadget with a spike on one end with enough space in the other end for you to feed your working end of rope into. The spike opens the troublesome strand, and you can push your rope through with it. Neat, huh?
Whatever you do, make sure you tie your splice correctly. A properly tied splice will be incredibly strong and will only endure a minimal strength decay over time. This is excellent when compared to other knots.
Variations
There are a number of various ways to tie an Eye Splice. They mainly depend on the type of rope being used, how many strands that rope has, and how many tucks are needed for the job in hand. Naturally, the more tucks a splice has, the stronger it is. For example, if you want to use an Eye Splice Knot for mooring, or for carrying heavy and critical loads, then you’ll want to use no less than seven tucks.
Alternatives
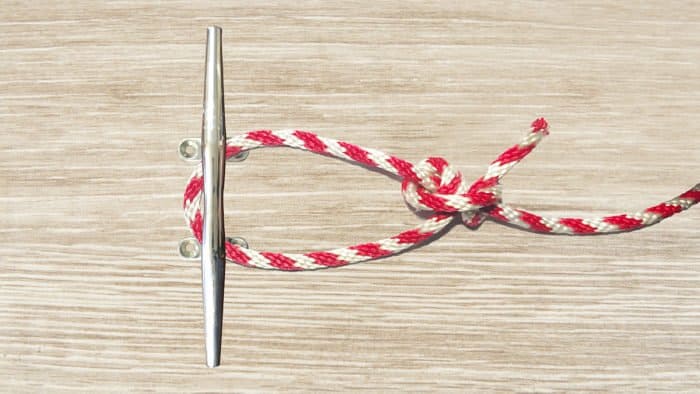
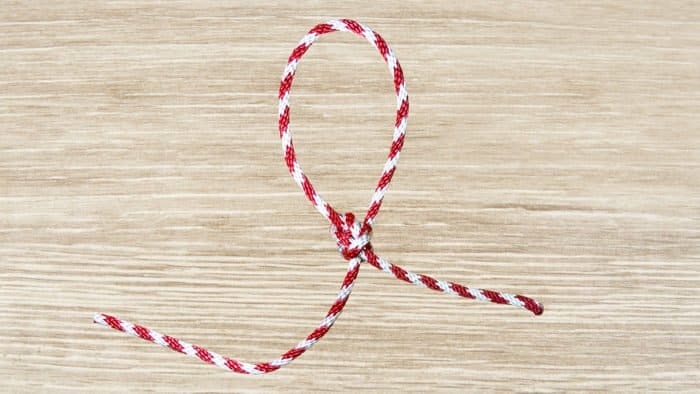
Lastly, what do you do if you need a strong loop but don’t have the time to make a full Eye Splice Knot? You can always use the Bowline Knot as a suitable alternative. The Bowline is a great knot that forms a strong loop at the end of a rope but it’s nowhere near as strong, reliable, secure, or trustworthy as an Eye Splice. It can shake loose when it’s unloaded, and it also reduces the overall strength of a rope at the knot by around 45%. In short: if you’ve got the time, use an Eye Splice. If you’re in a rush, and it’s not for anything critical, use a Bowline!
Categories: Nautical Knots