How to Wire Boat Trailer Lights
Published by Ian Fortey in nauticalknowhow Last updated on August 11, 2021
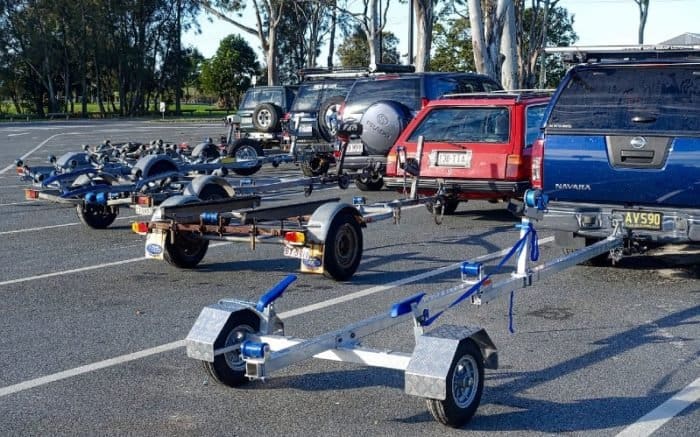
When you first get a brand new boat trailer, things are great. It looks good, it’s reliable, and it works well. As time goes by, things begin to get a little sketchy. Used and old trailers are notorious for lighting problems. Sometimes even new ones can be difficult to wire with certain tow vehicles. Wiring your boat trailer doesn’t have to be a hard job, though. It takes a few hours and if you do it yourself, you can save some money. Let’s take a look at what you need to do to get that boat trailer wired and on the road.
The Problem With Trailer Wiring
If you’ve had a trailer long enough, you’ve had wiring issues. More than the winch or the guides, the wiring causes issues. It’s not just you, so don’t worry. Research has shown there are over 4 wiring kits on the market for every single trailer in America? That’s a bad sign for your trailer light wiring. But it means you’re not alone and there are a few things you can do.
You may have a loose connection somewhere in your trailer wiring. Unfortunately, that is the least likely of the major possibilities. Still, it’s the one you want to check first. Check all the trailer connectors. Go from the left brake light to the right brake light. Check your turn signals and side marker lights. Follow your wiring diagram, if you have one. If the trailer connector isn’t an issue anywhere, then we can move on. There is a more likely and more problematic cause.
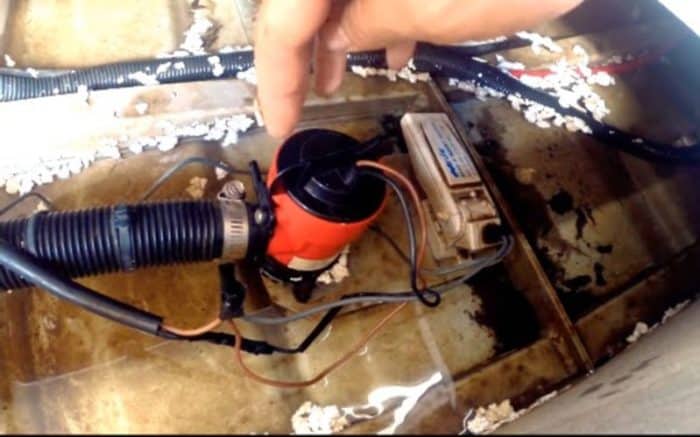
The big problem with your boat trailer wiring is the elements. Your trailer frame can only protect the wiring harness from so much. Water, salt and all that take their toll. Your brake lights and running lights need dry wires, that’s a fact. Water can get trapped almost anywhere in your trailer frame. If it’s built up around the mounting hardware or trailer connectors, it could leak out almost anytime. Then you have corrosion and a noticeable voltage drop. Soon the old wiring is no good and none of your trailer lights are working at all. So what can you do? Let’s walk through replacing old wires with new.
Working with Wires in Your Trailer Frame
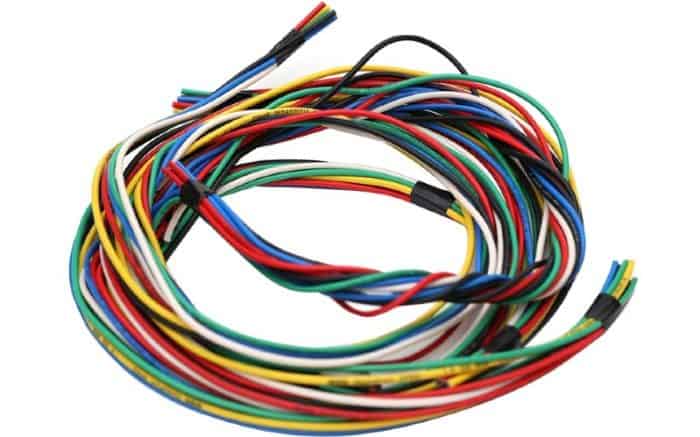
The first thing you need to do is inspect your old harness. If you’re not sure what kind you have, you need to figure it out. You’ll likely have a flat four or a flat five set up. That refers to the number of wires we’re dealing with.
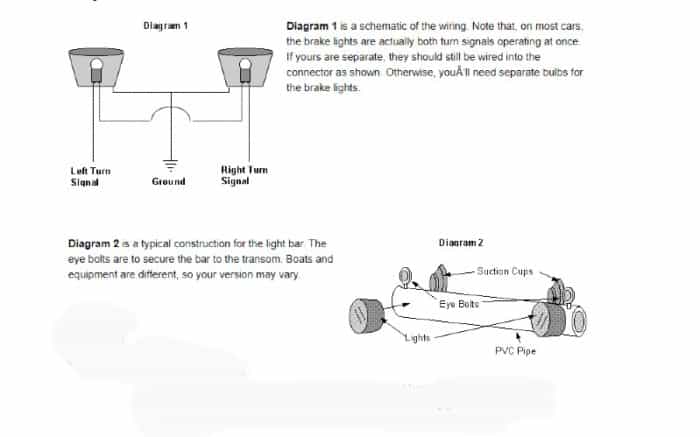
A flat four has two sets of two wires. There will be a brown wire and a yellow wire that go to the left. The right side has a brown wire and a green wire. Sometimes the wire will be black, not brown.
A flat five has a blue wire in addition to the four colored wires we mentioned. The blue wire connects to a surge actuator.
Both the flat four and the flat five have a white wire as well. The white ground wire can connect to a bolt behind the coupler.
Your wires are either going to run through the metal frame itself, or maybe a light bar. A light bar is never a bad idea. It’s essentially just a length of PVC pipe. It can help protect your wires from the elements. Some people get fancy and make them out of wood or aluminum, too. It’s up to you.
You can get a wiring harness at any marine, marine supply dealer, and online shops.
Make a Wiring Diagram
Before you remove any wires, see how they’re set up. That means which wires go where, from the harness to the lights themselves. But also, check how they attach to your boat trailer frame. Do the wires just run through the frame? Is there a light bar?
Sketch out a simple diagram of how the lights are arranged. You don’t need to get really complex. A simple line frame that represents the trailer shape will do. Then draw the correct colored wires according to where they run.
You may think you don’t need it, but it removes any doubt.
Make sure you have enough wire to wire your whole trailer. Sometimes wiring kits can cut it a little close. Especially ones that are meant to be universal. You need enough to get all the way to the clearance lights at that rear cross member.
Remove the Old Wires
Start this step by disconnecting your old lights. Take the brake lights, the running lights, and whatever else you have. Take off the old hardware and set it aside. You can add all of this to your diagram if you’re not confident you’ll remember. If this is your first time wiring a boat trailer, it’s a good idea.
Remove the old harness. Check around the frame for any corrosion. If you’re attaching a new harness and new wires, you want it to be clean. If there’s a lot of rust, sand it down. Use a wire brush or something similar. Cleaning it up and painting it wouldn’t be a bad idea. But it depends on how much time and effort you want to invest in it.
Remove the wires from the lights. Now you can unclip the wires from the frame. You’ll want to run them right out of the front of the trailer by the tongue.
To make the rewiring a little faster, you can use the existing wiring to thread the new ones. If the tongue of your trailer is closed up, it can be hard to thread those wires on the first try. Just tie the new wires to the old and pull them on through.
Run the New Wires
We really recommend using the old wires to thread the new wires. Especially if you’re going through loops in the frame. It’s just faster to do it that way. You don’t have to, but it’ll save you some time. This whole job can take a couple of hours. Anything you can do to save time is worth it.
Brown and yellow should be bundled together. You want this to run down the left. On the right side, you’re going to have brown and green. Remember, the white wire is your ground wire. Connect that to a bolt somewhere behind the coupler. You’ll want to strip the wire back and just attach it to the same bolt the old wire was attached to. Remember, if the bolt is corroded, you want to clean it up. If you don’t want to just wrap the exposed wire around the bolt, try a ring terminal. You can use some heat shrink collars here to prevent future corrosion.
If you have a flat five, then you’re connecting the blue wire, too. That goes to the solenoid on the surge actuator. The purpose of that blue wire is to deactivate the surge actuator if you have disc brakes.
You want the left and right sides to run through evenly. That means the same length on both sides. Plus, you need a good length at the tongue to connect to your tow vehicle.
Connect the Running Lights
This step needs to be adapted a little depending on how you boat. Freshwater vs saltwater is important here. If you’re backing your trailer into freshwater, you can use pinch wire connectors. These are fine for connecting the 12-volt pigtail from the running lights to the main wires. You can connect the clearance lights in the same way.
If you boat in saltwater, do not do this. You are guaranteed to lose your wires to corrosion in no time if you use the pinch wire connectors. Instead, use crimp connectors. Once you’ve done that, use some heat shrink tubing. That will add another layer of protection.
Connect Your Brake Lights

The two wires that go to the brake and turning lights each have a different purpose. That brown wire is going to connect to the running lights. The green on the right and the yellow on the left are for brakes and turning.
Connect the brown wires for your running lights first. In some rare instances, this may be a black wire. It’s not going to be one of the brightly colored wires, though. Once they are set up, you can move on to the colored wires for your brakes.
Start on the left side. Connect the yellow wire in your wire harness to the yellow trailer wire. This is a moment you may have some trouble if you have a different setup. Sometimes your trailer wire will not be yellow. If that’s the case, you likely have a red wire. You can connect the red wire to the yellow wire here.
When you connect on the right side, you’re using green wire. Again, the connection may not be exactly the same. You may have a red wire on this side as well. Just remember to connect green to red here. Brown/black will always go to brown/black.
Just as with your running lights, you want to make adjustments based on water here. If you boat in freshwater, you can connect your wires with simple pinch wire connections. This shouldn’t cause too many problems in terms of corrosion.
If you’re boating in saltwater, you want those crimp connectors. Once you have them connected, then go for the heat shrink. That will give your new wires the best protection from corrosion.
We’d recommend going the extra mile even if you boat freshwater. You can get by with the easier route and it could still be OK. But if you use crimp connectors and the heat shrink, you’re as protected as possible. This will ensure your boat trailer wiring lasts as long as possible. This isn’t a super hard job, but do you want to do it again in a few years?
When it comes to light installation, read any instructions that come with new lights. If you’re using old hardware, you’re fine. Just follow your old diagram. But if you bought a new kit, make sure you know how it works. Some brake lights, for instance, have specific sides for installation. One light is intended for the driver’s side, one is intended for the passenger side. Make sure you know for sure which is which.
If your new lights don’t line up exactly with your frame, you may need to make some tweaks. It’s possible you’ll have to drill new holes for the screws.
If everything lines up, it’s time to install. Trim the trailer wiring and then strip the ends. Attach the wires by color to the connecting points. Bolt the lights to the trailer frame when you’re confident you have them attached and wired.
Give it a Test

When you have lights wired up, it’s time to test the circuit. You don’t need to secure anything yet. You want to make sure everything works before you make it permanent. Connect the wires to your tow vehicle. Now you can start your engine.
Obviously, this works best with a friend to help. You can do it yourself as well, it’s just going to take a little more work. Check to make sure your brake lights come on at the right time. Then check your turn signals one at a time. If all your lights are a go, then you can move on.
If you find one or more lights not working, you’re going to need to retrace your steps. If it’s every light, it’s probably a problem where you’re connecting to the vehicle. If it’s an individual light, then that’s easier to diagnose. Go back and check all of your connections and try again. A circuit tester is ideal here to find out what went wrong.
Keep it Secure
How you hold your wires in place depends on the trailer frame. We already mentioned running them through a light bar. Your trailer may also have tubing just for this purpose. If there’s hardware already set up, use it. Along the frame, you can also use galvanized wire clips. This works on a C-beam or I-beam frame. Just make sure the clips aren’t digging into the wire sheaths.
Keep your wires taut as you secure them. Move from the front of the trailer all the way to the back. Clip them down so that they’re out of the way. You want them to be protected by the frame. It’s not just water you’re trying to avoid. You need to keep the wires away from all moving parts. Also, from any junk you may run over on the road.
You need to make sure that, when you secure the wires, you leave slack. Just at the end where it connects to the vehicle, though. More than one trailer owner has forgotten to leave enough slack on the wires. Remember, just because it comes out of the frame and connects to your vehicle, you may not be safe. You need enough slack that you can take a wide turn. That will pull the wires to their maximum length. If there isn’t enough slack, your wires will tear free. You don’t want that on the road.
Check all the connection points. You don’t want those wires pinched anywhere. A pinched wire is more likely to stop working much faster than one that’s just snugly secured in place. Those galvanized wire clips are perfect for this. They are designed to have a little bit of give. It holds the wire but doesn’t clamp down on it. You want the clips to hold your wires securely so that if they get bumped and jostled, they don’t pull free. Wires that aren’t secured can be a real safety risk. Not only are they going to be exposed to the elements, they can snag. The last thing you want is a wire dragging on the road or getting caught and pulled out.
If your wires pull loose when driving, then your light goes out. At that point you are likely to never notice until someone tells you. After all, you’ll have checked the wiring earlier and seen that the lights all worked. So it’s very possible that you’ll discover a wiring problem when law enforcement pulls you over. You’ll have a ticket for not having working lights as a reminder. For the price of a couple of small clips that can be avoided.
Tips for Wiring Your Boat Trailer Lights

Our directions here are just one of many ways you could do this job. Obviously, we think this is the best approach. But there are some other things you can do as well.
One great idea is to double down on waterproofing your connections. We recommended crimp connections. If you’re worried that isn’t enough, then you can do more. Soldered connections offer a greater level of reliability. Then you can cover them with marine-grade silicon. That goes for your crimped ones as well. The silicon ensures that water is not going to be an issue going forward. That doesn’t just apply to when you launch the boat, either. You know you’re going to be towing your boat in the rain sometime. And on a wet road, you have rainwater coming from above and below. The tires are going to be splashing water up under the frame all over the place. A properly secured and waterproofed wire can stand up to any of that.
You can buy sealed marine lights if you want. But you can also buy some cheaper trailer lights if you want. Since you’re sealing wires on your own, you’ll save money. The thing to remember about this is the quality of the bulbs. Regular bulbs work fine here. They’re going to burn out on you faster than you’d like, probably. But if you have a standard trailer light kit, that will be OK. You can get replacement bulbs just about anywhere. And they’re cheap as well.
Mounting your lights on a light bar is a time saver as well. Like we said, a simple PVC pipe can work. These will protect the lights and the wiring. It also makes it easy to swap wiring and hardware in and out.
Double check your ground wires before you sign off on anything during installation. Your lights can work fine without a ground wire and some kits don’t even include a ground wire. Some of them use the hitch as a ground. However, that is a major cause of lights failing. You need that ground wire to keep everything working properly. It will greatly extend the life of your lights. No ground wire or a poor ground means a greatly increased risk of a short circuit. When you’re dealing with wires that are guaranteed to be exposed to water, this is essential. If you find a wiring kit that doesn’t include a ground wire, think twice about getting it.
Remember to be smart about securing your wires. Like we said, you don’t want wires flapping loose and dragging on the road. But at the same time, you don’t want to secure every inch of wiring. Not because it will make it work poorly, though. At some point, it becomes overkill. You shouldn’t have to spend hours just securing the wiring for your trailer. Keep in mind, you may need to do this again one day. You don’t want to spend forever getting those wires loose again.
The Bottom Line
For many people who don’t do electrical wiring normally, a job like this can be intimidating. Electrical wiring is scary for many people. But it doesn’t have to be. The job is a lot more simple than it seems. Remember, a boat trailer is a very simple machine. It’s a frame and wheels. The lights are the most complicated part. And as we’ve seen, that’s as simple as two pairs of wires running down each side. Once you know what you need to do, the job can be easy.
From start to finish, wiring your boat trailer lights should only take a few hours. If you’ve never done it before, set aside about four hours. If it takes longer, that’s OK, too. There’s no prize for speed here.
If you’re not sure what you’re doing, don’t be afraid to ask for help. Even just a quick Google. If that doesn’t work, someone at your local marina will probably be more than happy to help.
Keep safe and have fun.
Categories: nauticalknowhow


2 Comments
Robert Hogward on September 1, 2021
Great article! Given the usage of a boat trailer, submersible lights are needed in most cases. Thanks for sharing 🙂
Jack Ducan on December 28, 2022
Thanks for sharing these useful tips. As for crimp connectors, they provide extra protection against corrosion. I double that prevention effect by securing all of the light connections with heat-shrink collars.